Platform Overview
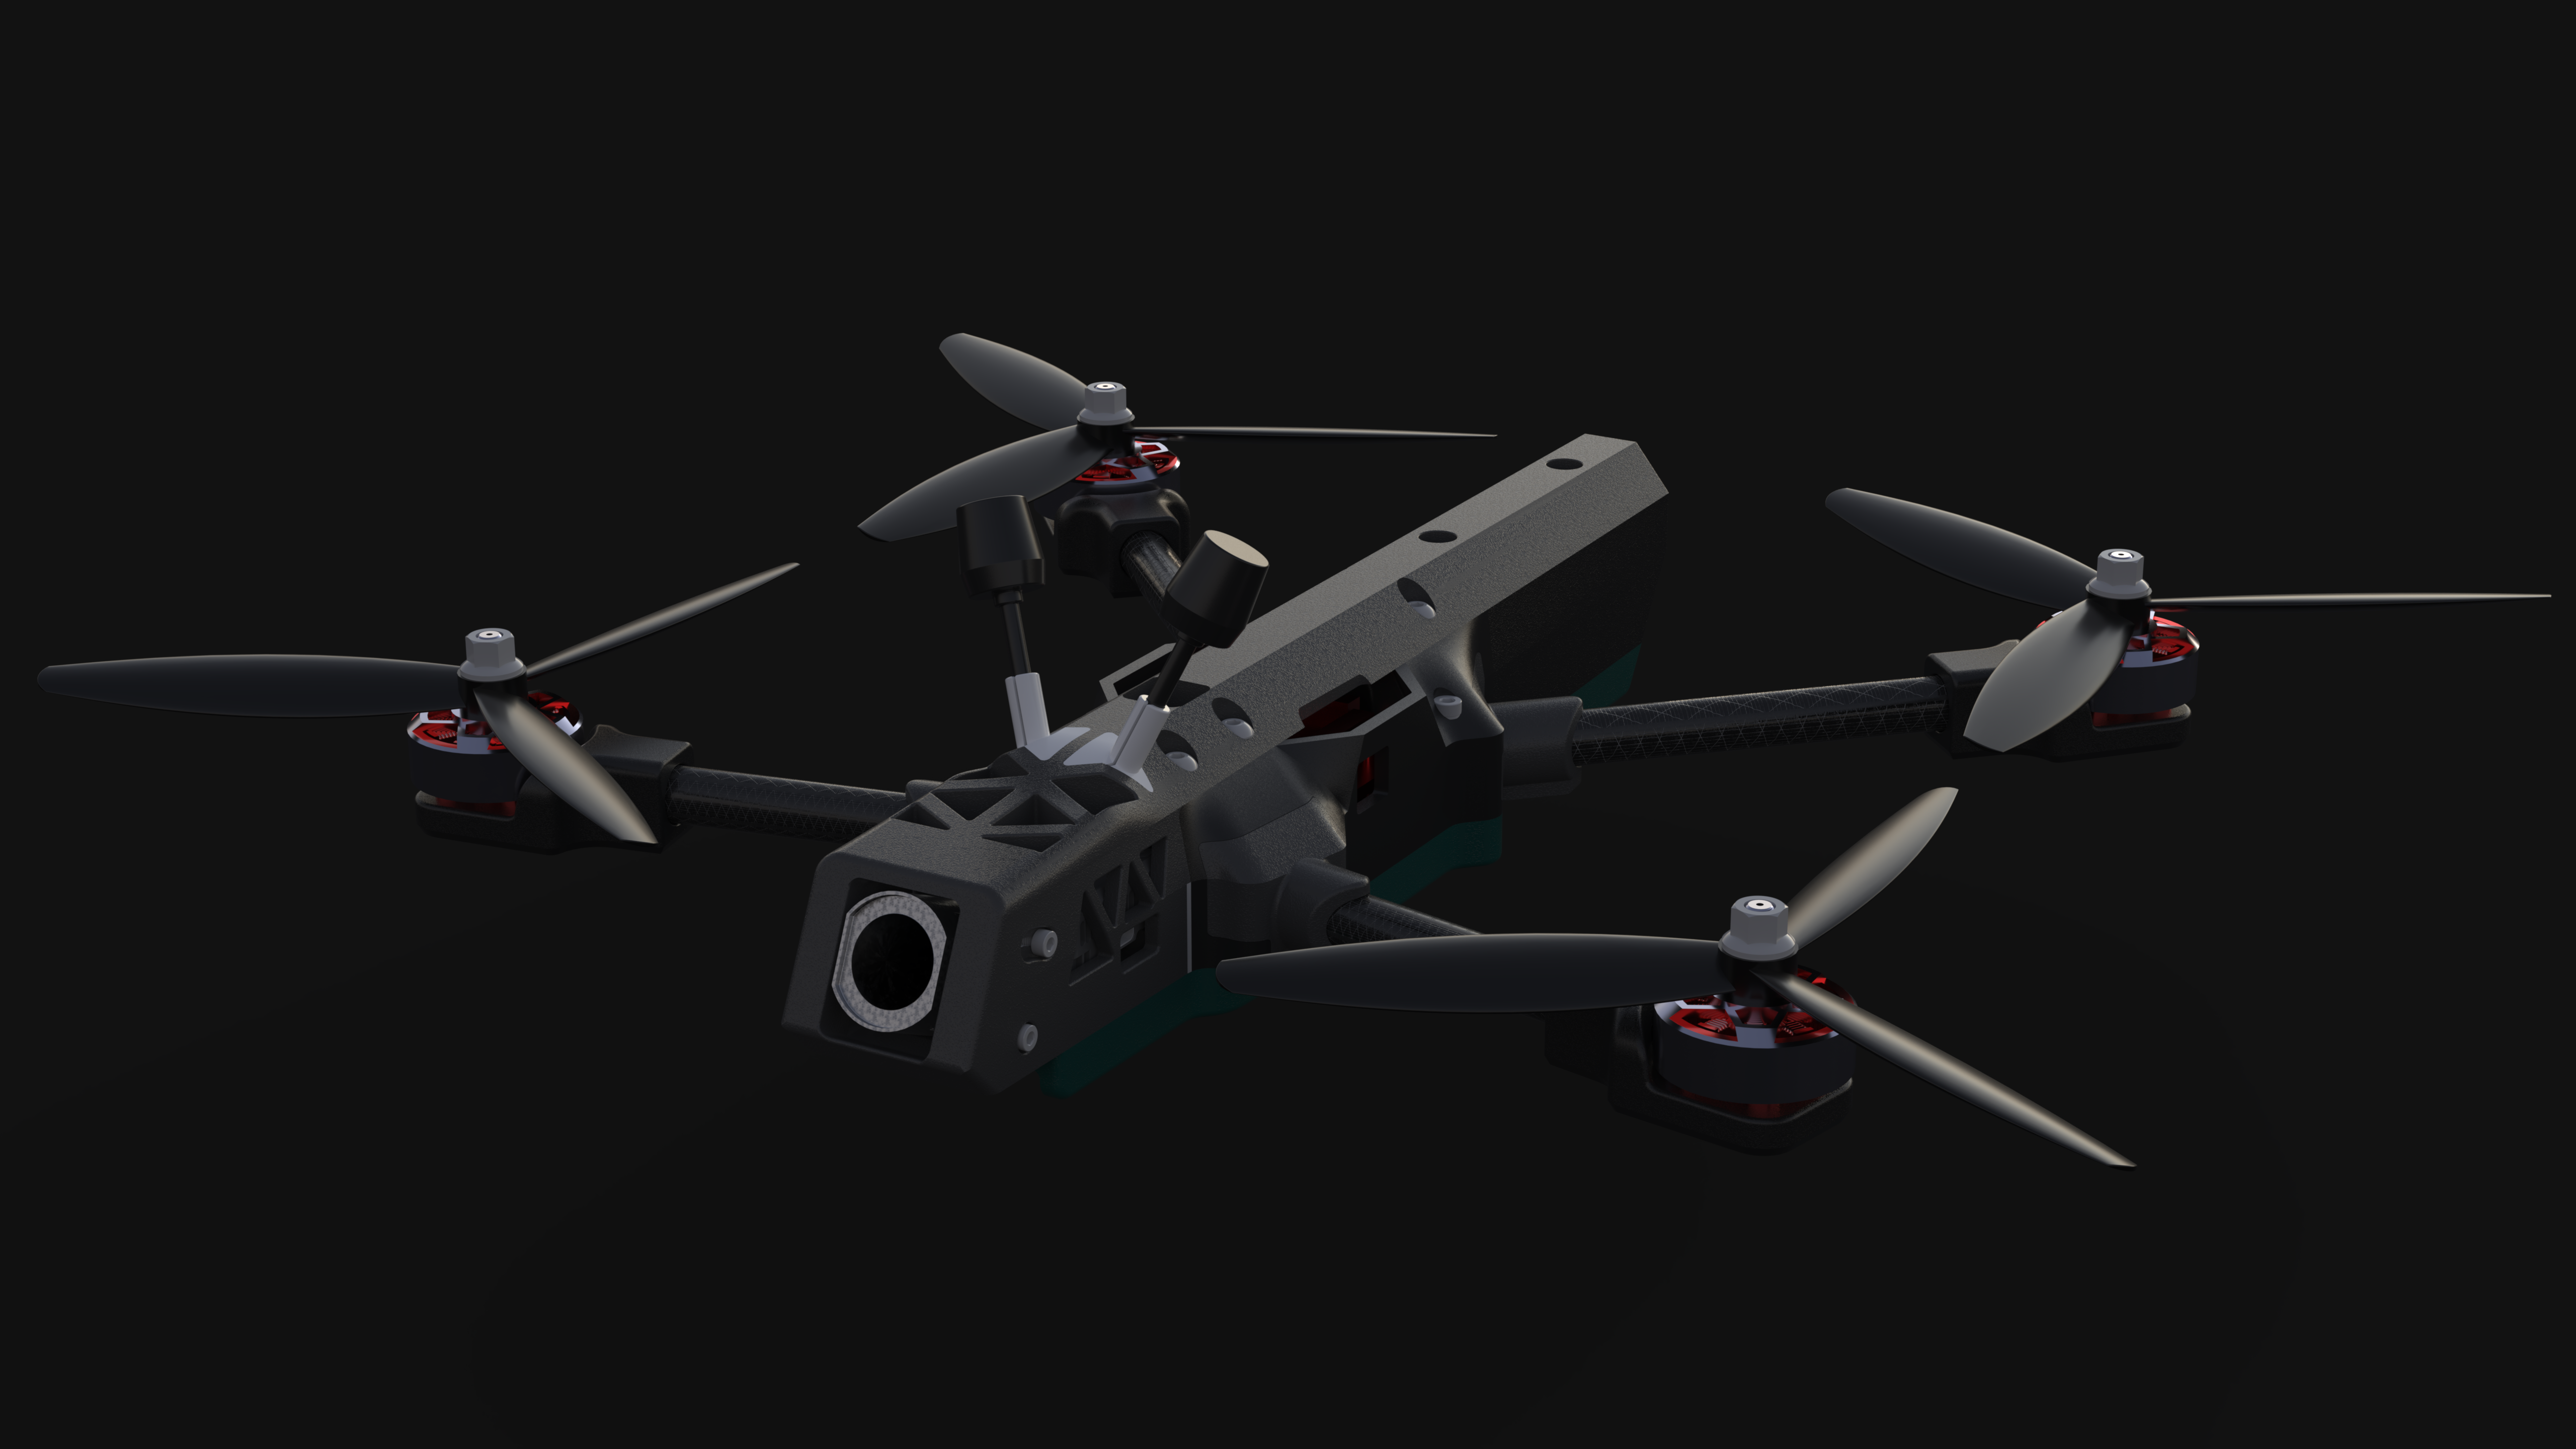
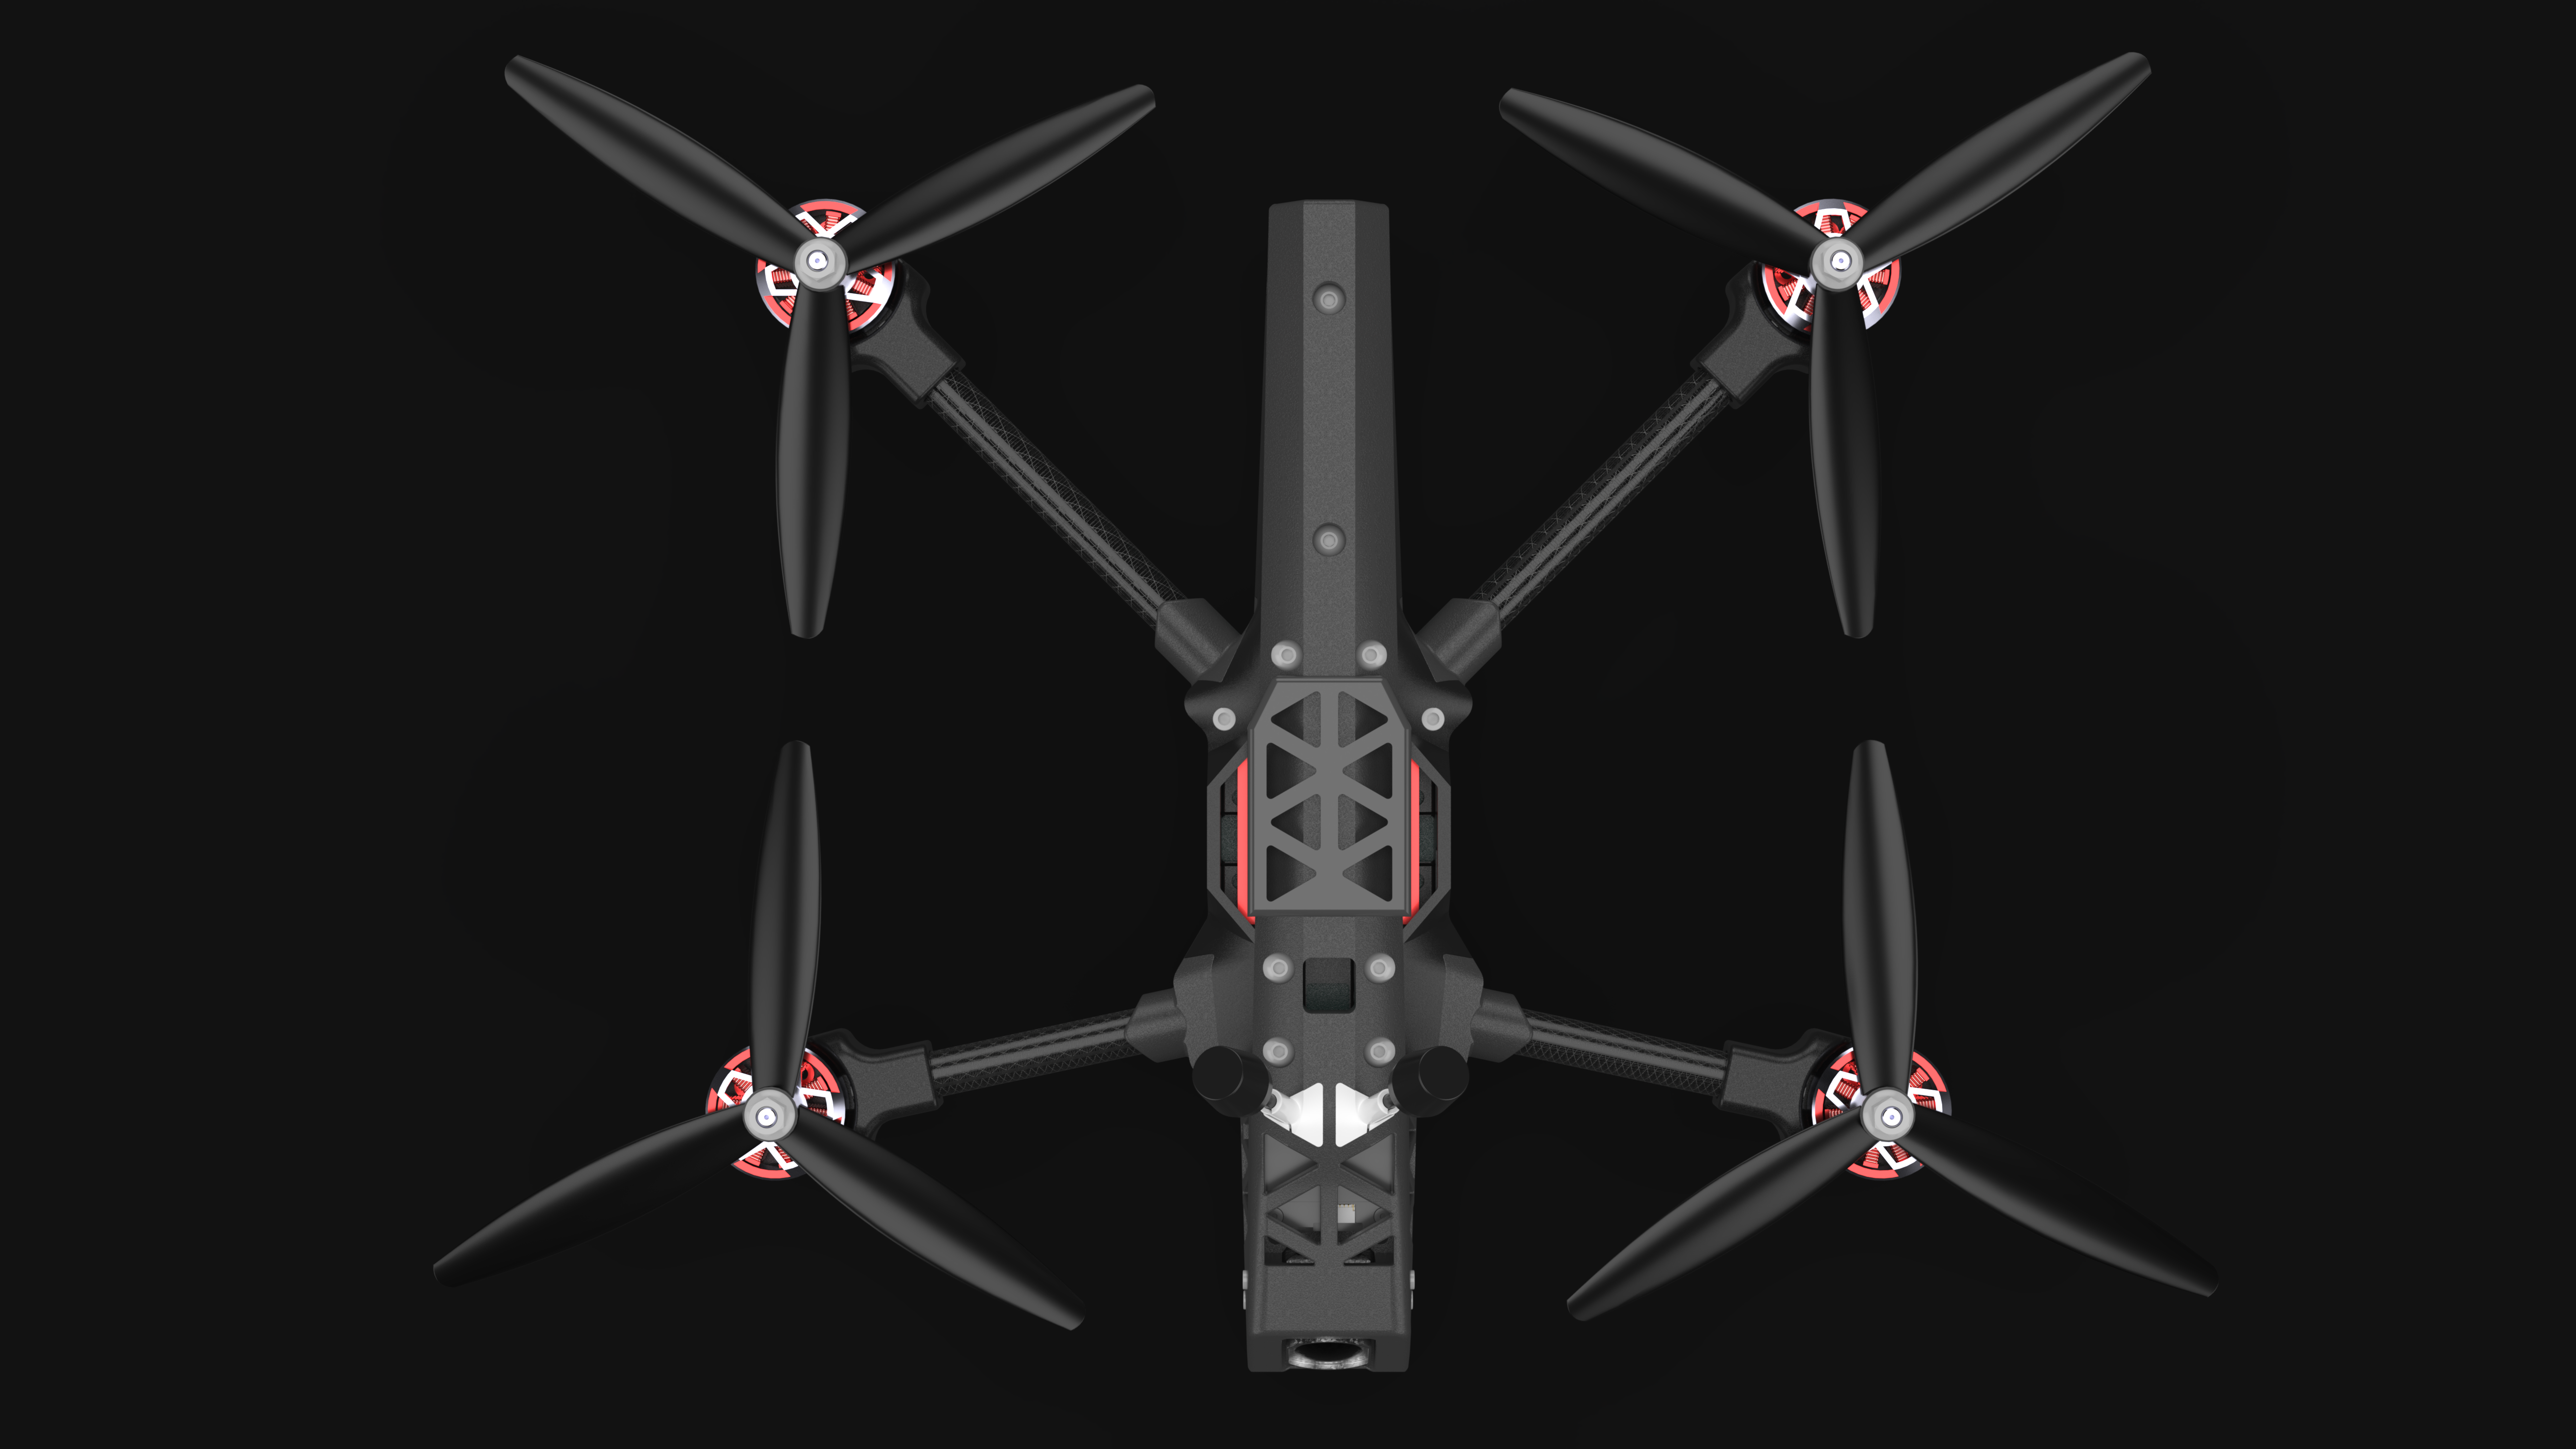
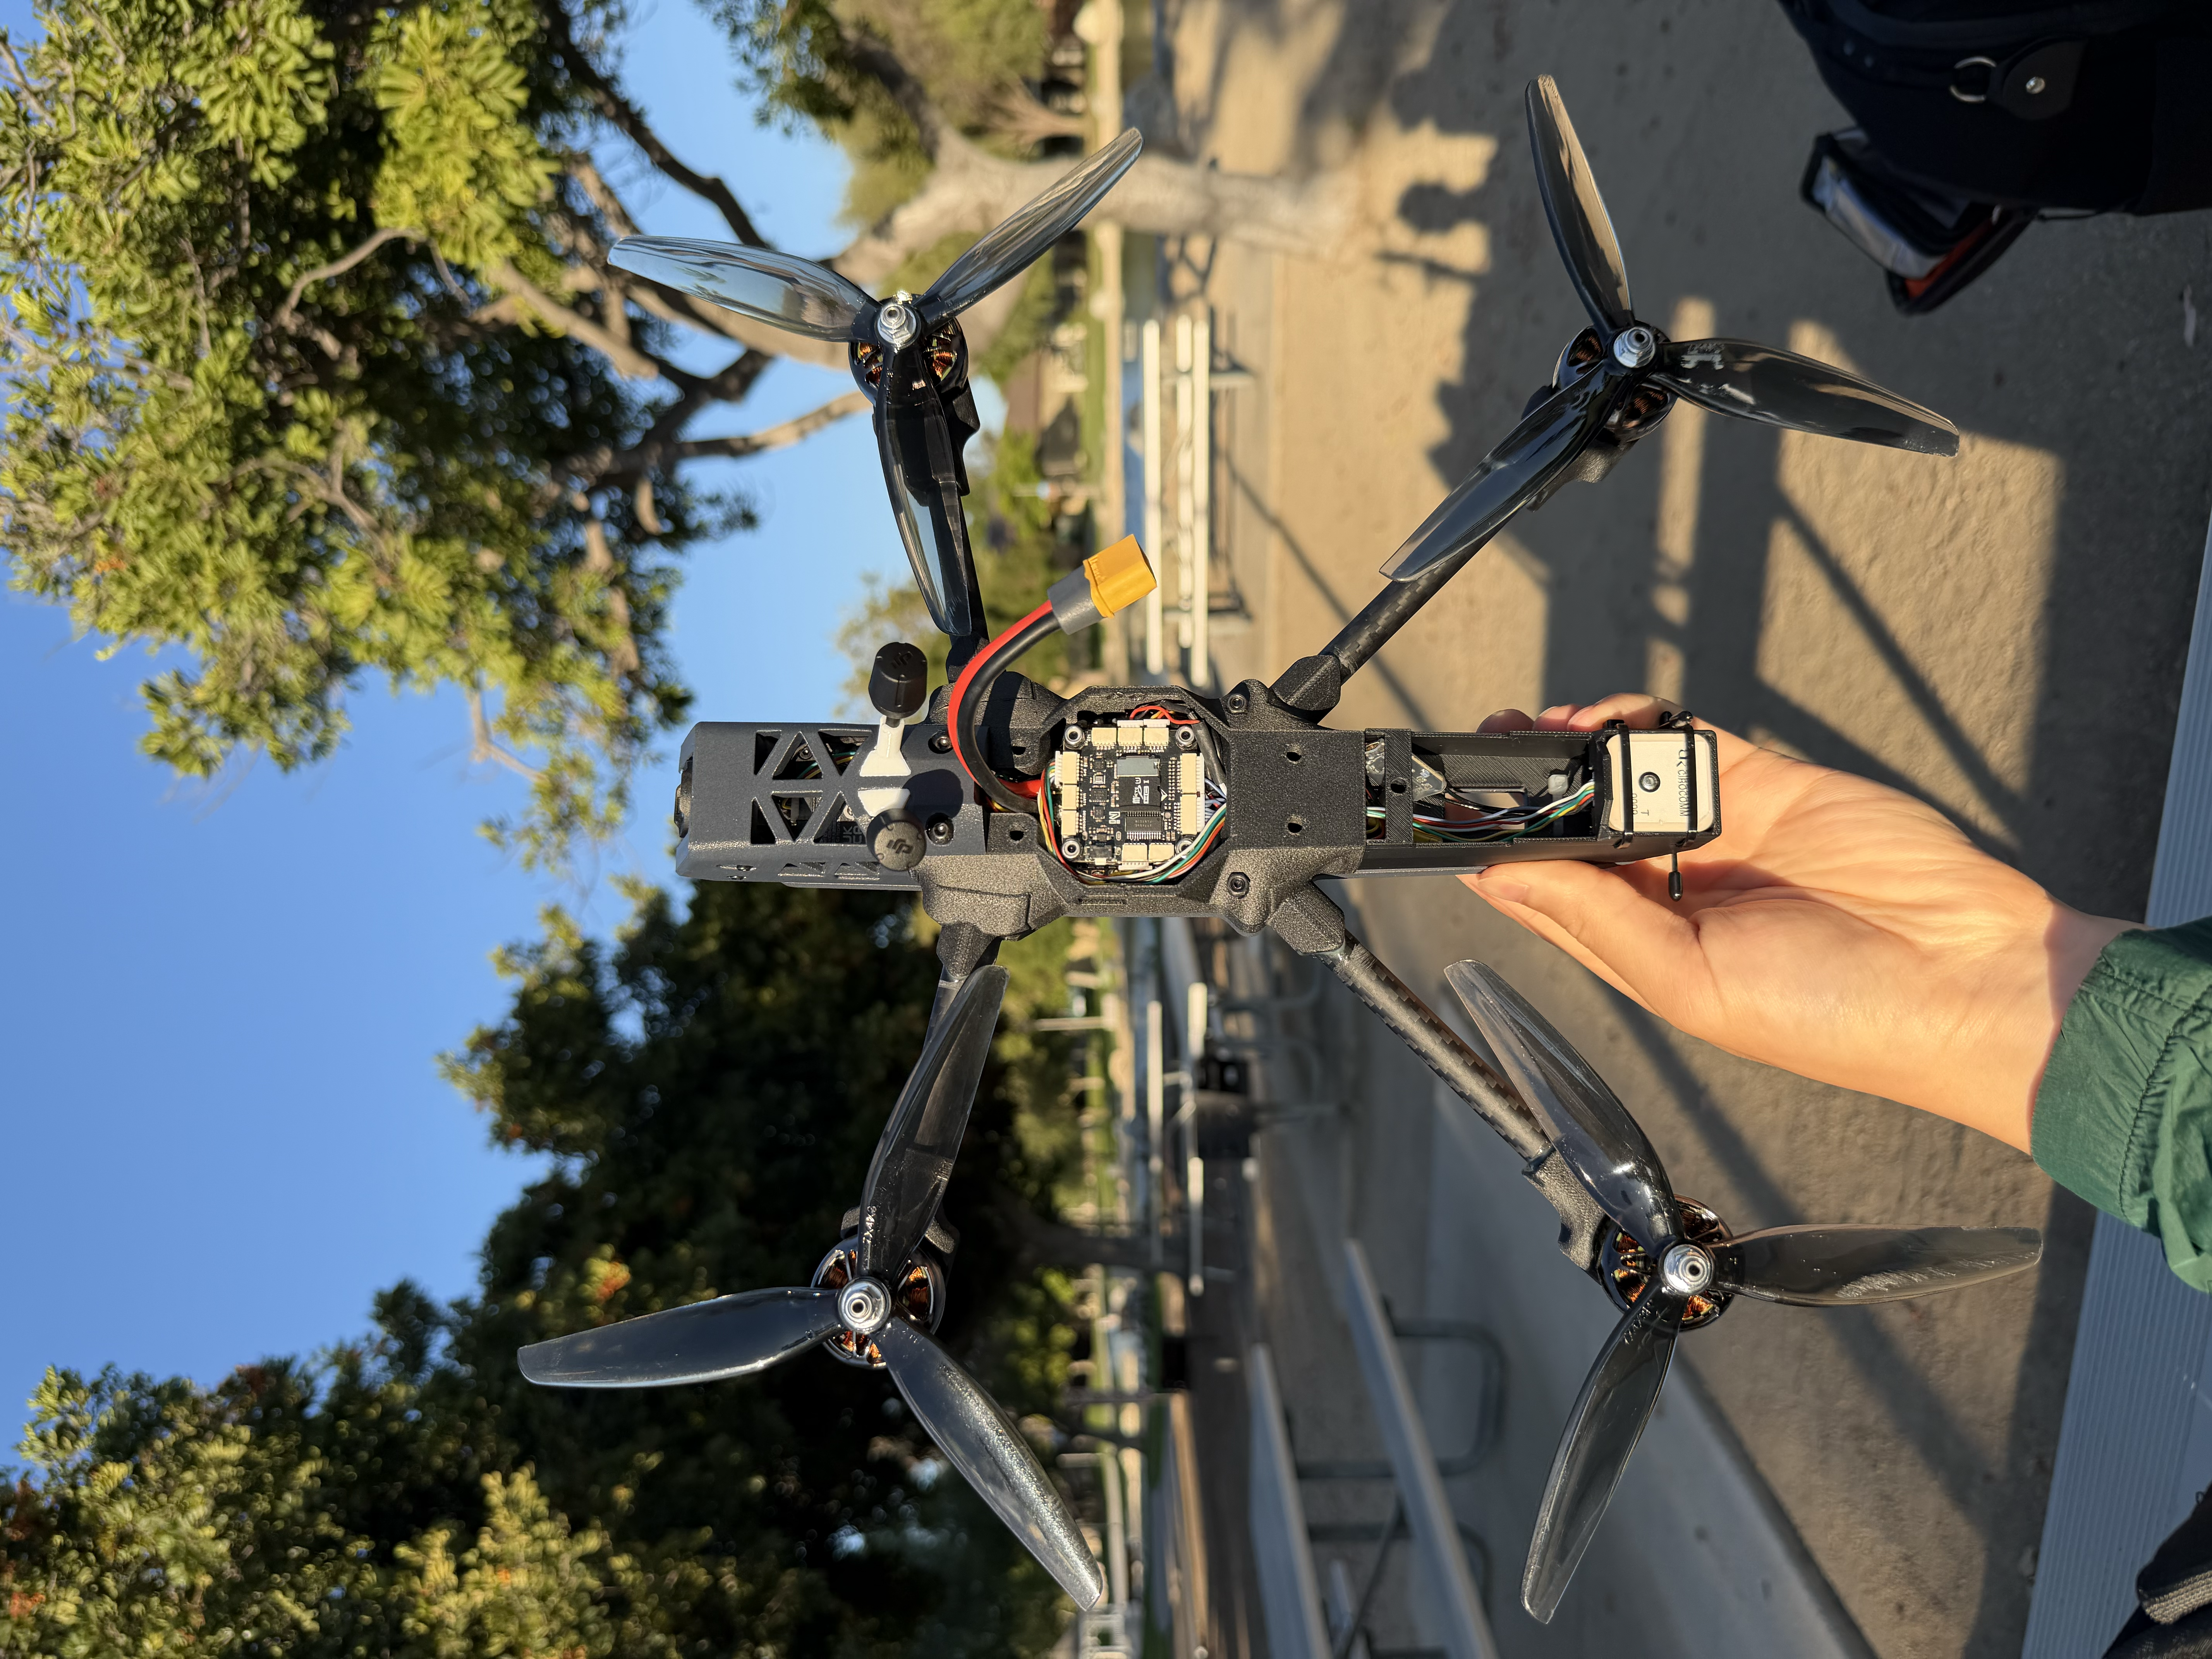
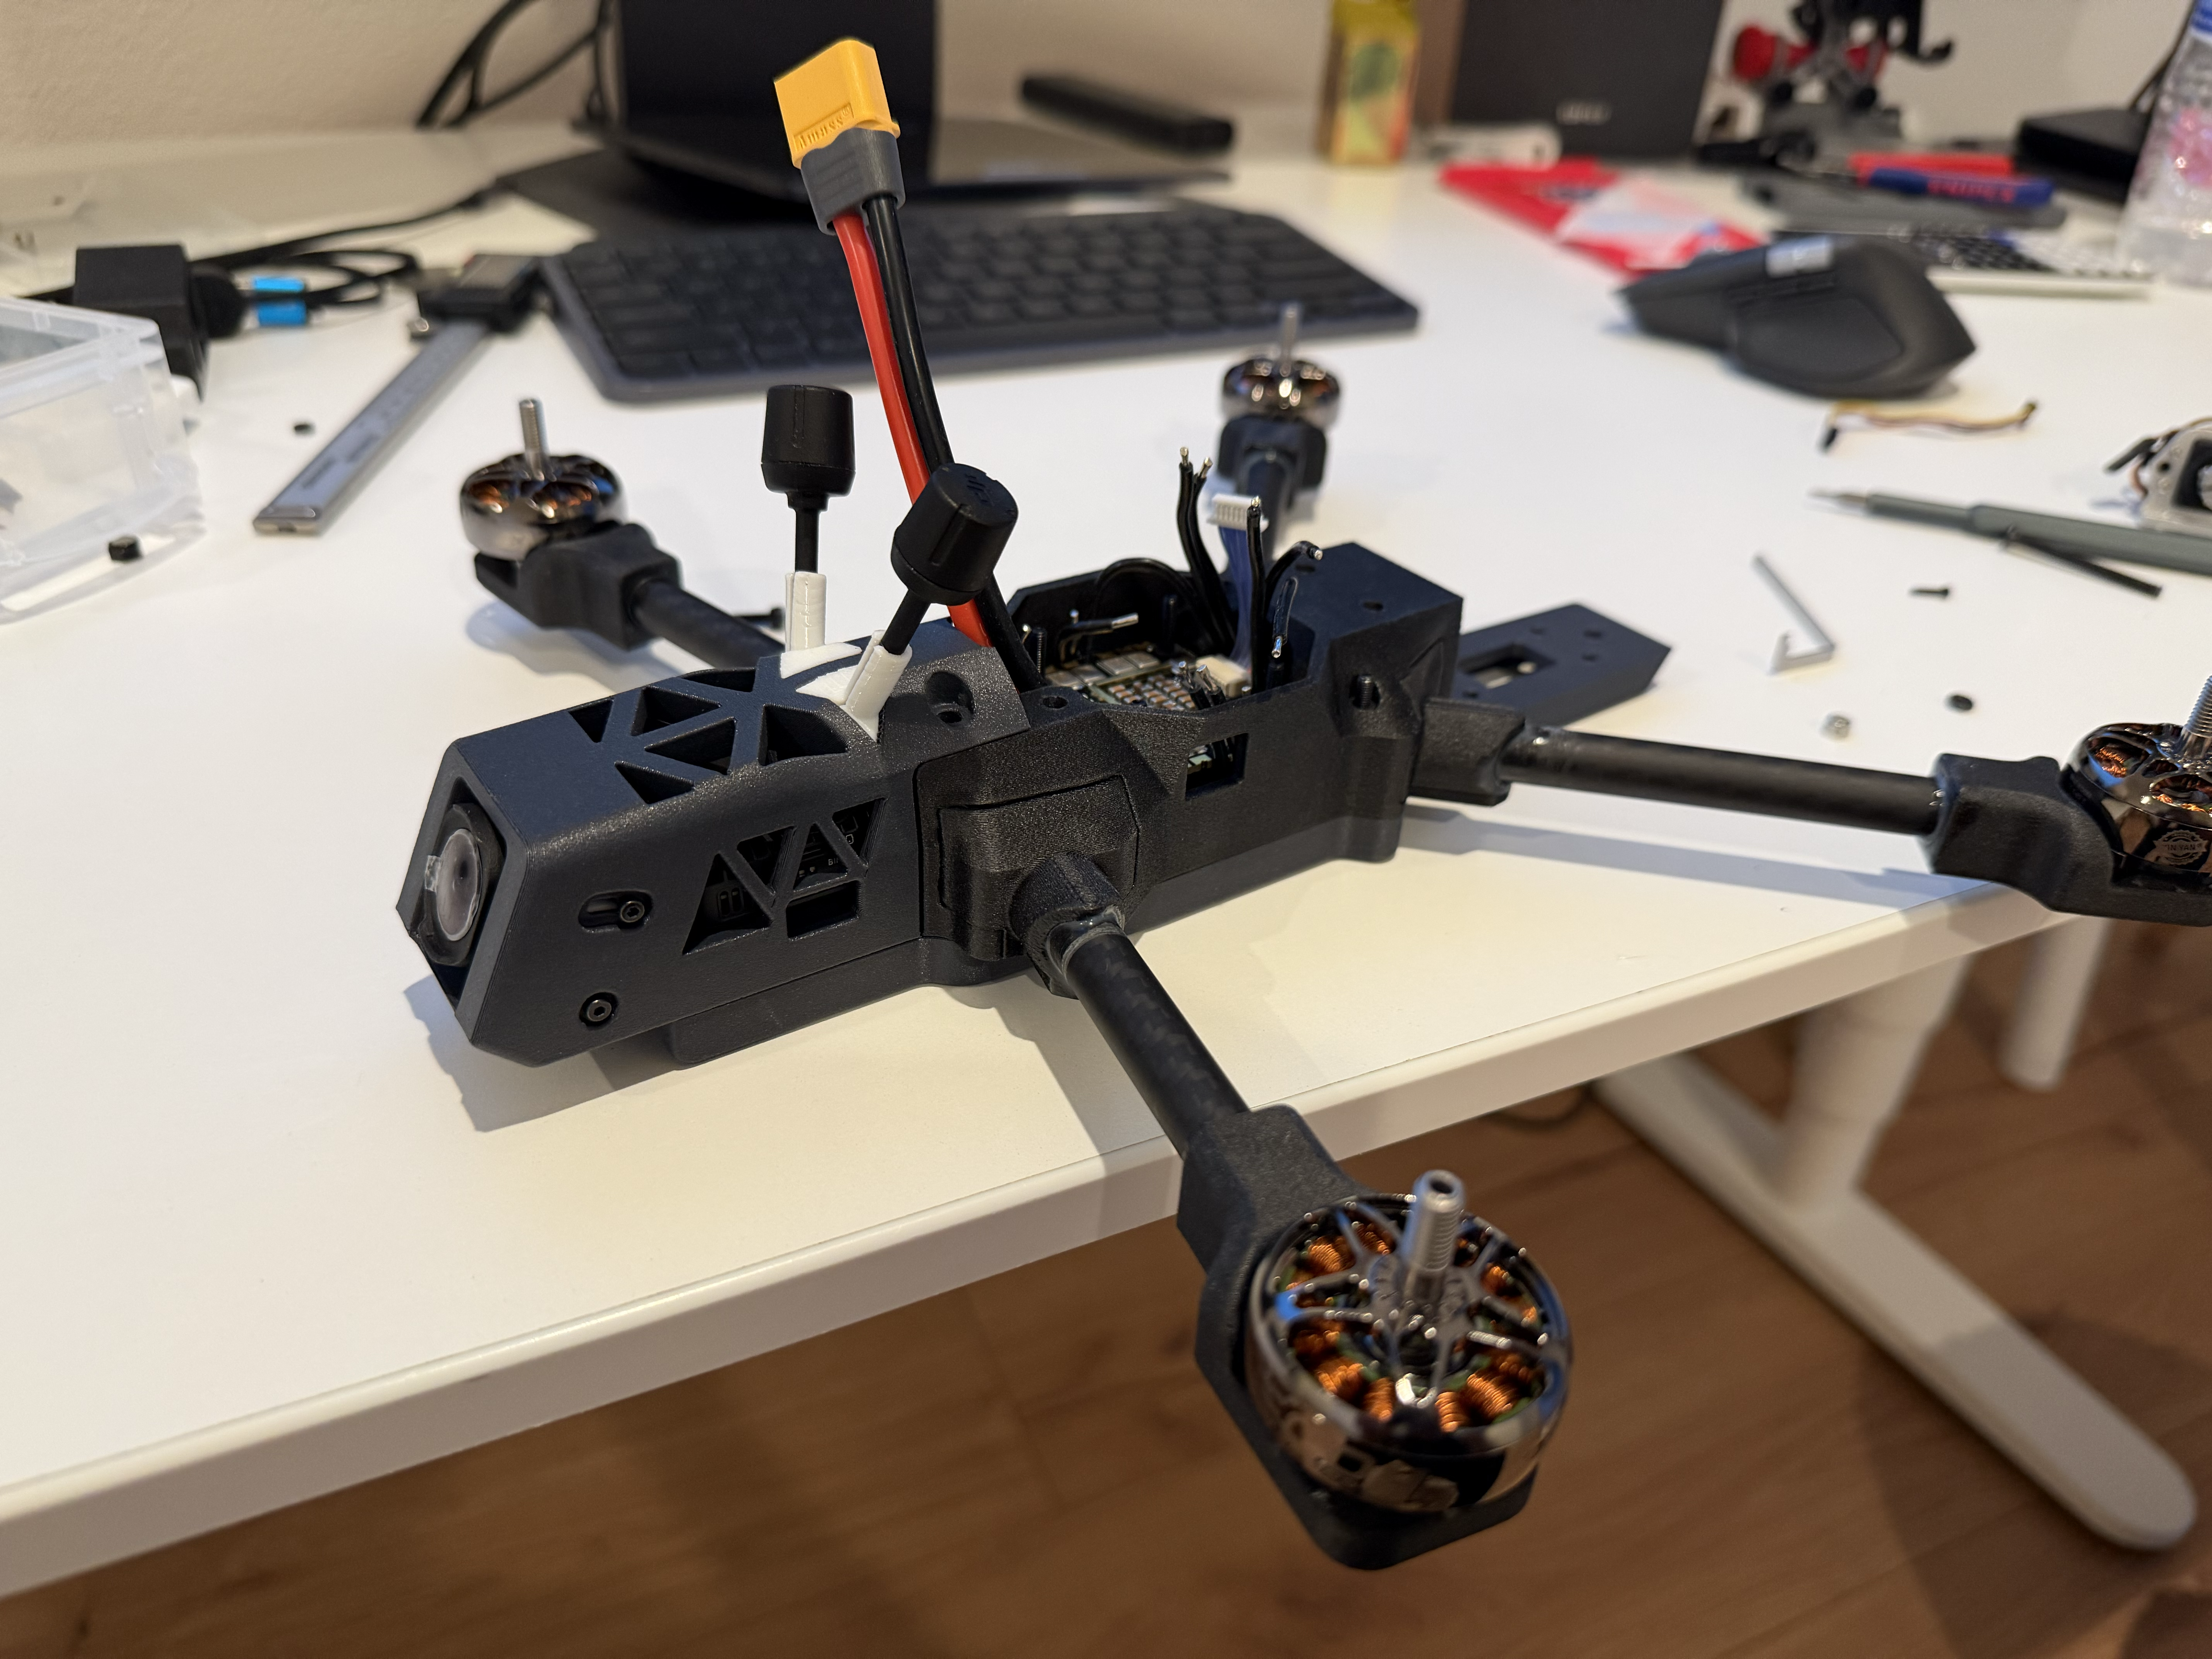
The Tejo GEN 1 is a modular 7-inch drone platform built around a printed CF-infused chassis, bonded carbon arms, and a shared module interface.
What is Tejo?
Tejo is a fully documented platform. We design and manufacture the airframes ourselves, and we publish every printed part, print config, fastener, and firmware setting so the aircraft can be built, repaired, and modified without going through us.
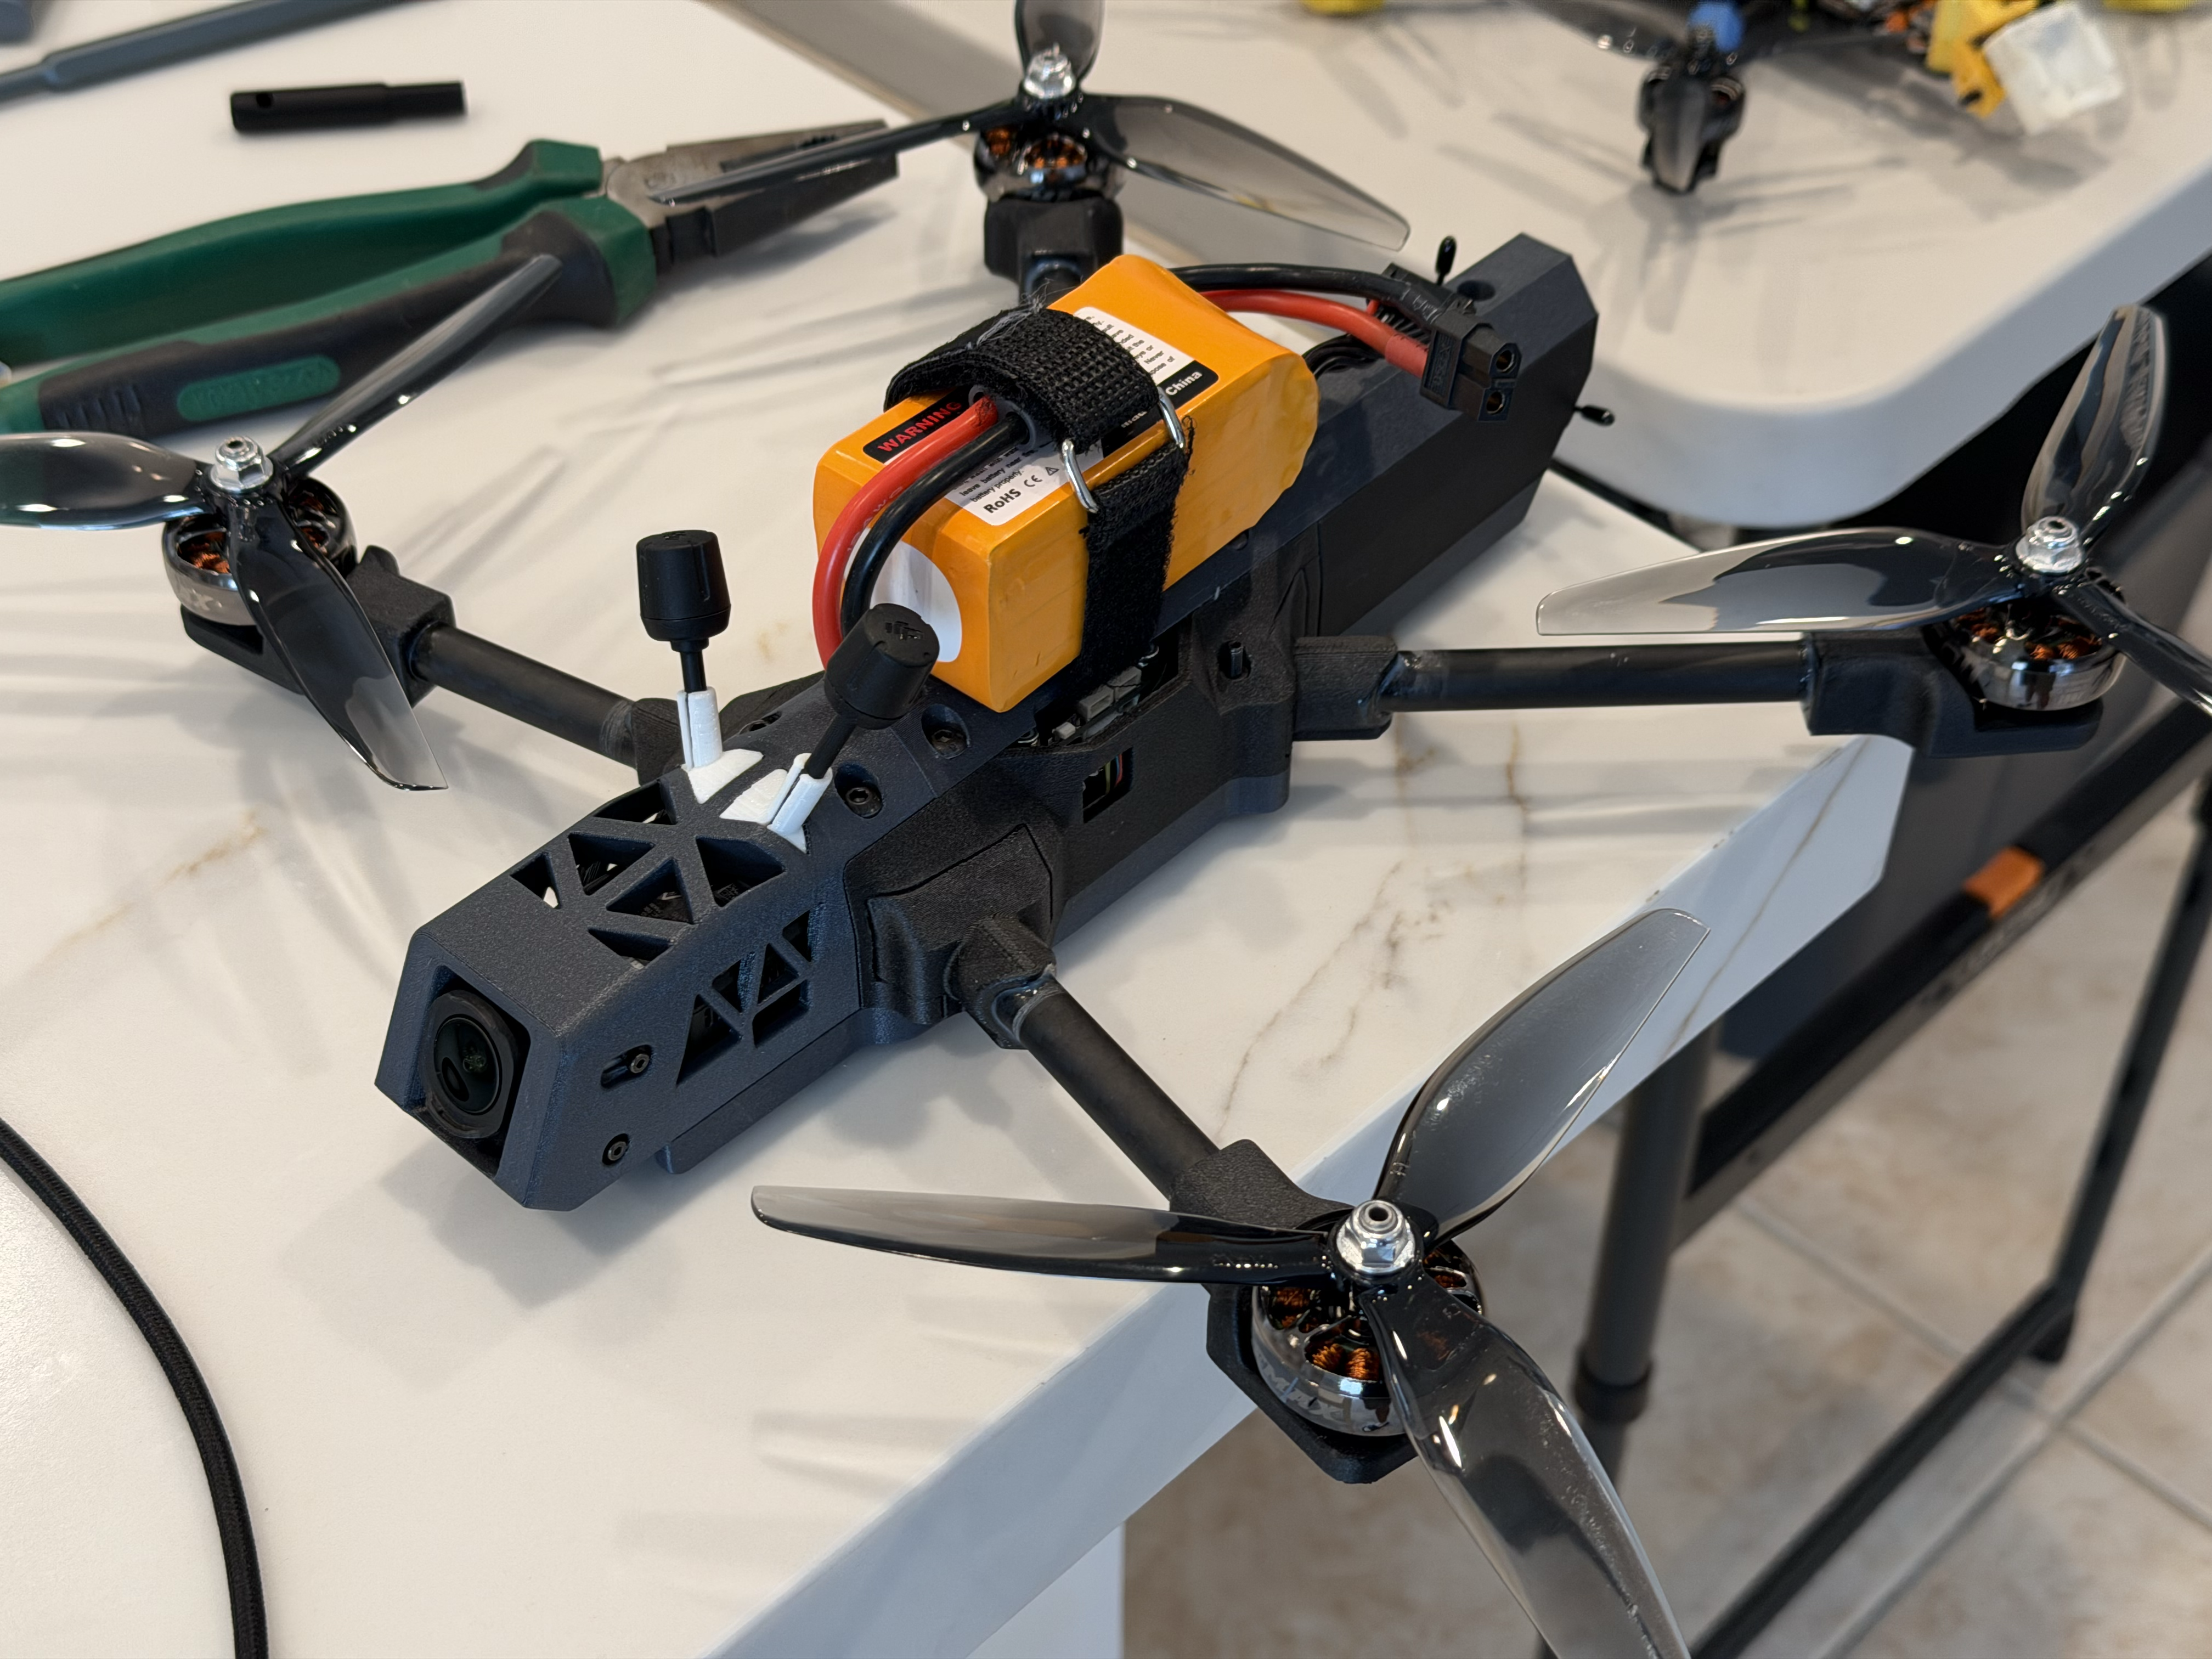
- ›7-inch prop format tuned for long range and payload work
- ›Fully 3D-printed chassis in PPA-CF or PETG-CF — any high-performance CF-infused filament works
- ›Bonded carbon arms (DP460) for stiffness and crash survivability
- ›Shared module interface for cameras, sensors, and drop mechanisms
Design renders
How the docs are organised
- ›Files & Parts — CAD downloads and the full parts list
- ›Build — 3D printing, arm bonding, assembly, and firmware
- ›Systems — payload bay
- ›Licensing & Business — the single-builder licence, commercial programs, and the NDAA-aligned variant
Specs at a glance
Reference electronics
The airframe is electronics-agnostic — this is simply the kit flying on my own aircraft, published so you have a known-good starting point. Swap any line for what you already own.
- ›Motors — 4× EMAX ECO II 2807 1500KV; another KV or a similar-size motor is fine
- ›FC & ESC stack — MicoAir743 V2 with AM32 70A, 30×30; most 30×30 or 20×20 stacks fit
- ›VTX + camera — DJI O4 Pro or O4 Lite; mounts for both camera modules are in the files bundle
- ›Receiver — RadioMaster RP4TD-M ELRS 2.4 GHz; other receivers work too
- ›GPS (optional) — MicoAir MG-A01, 25×25, on the GPS top spline
CAD Downloads
Full STEP files, pre-tuned 3MF print projects, and reference drawings. Everything you need to print and modify the Tejo airframe.
Get the files on the store ›Print-ready bundle
The 3MF projects come pre-sliced for PPA-CF / PETG-CF with our recommended wall and infill settings baked in. A 0.4mm nozzle is optimal for quality — what we used — while a 0.6mm nozzle is also acceptable for the larger parts.
- ›Chassis body, arms, and canopy
- ›Three frame variants — separate-arm (default), single-part, and single-part + rear
- ›Arm clamps and motor mounts
- ›Camera mounts for both DJI O4 modules — Pro and Lite — plus the O4 antenna mounts
- ›Top spline in GPS and non-GPS versions
- ›Payload bay and mount adapters
Parts List
The complete bill of materials for a flight-ready Tejo GEN 1 — Tejo printed parts plus standard off-the-shelf electronics.
Tejo parts
Airframe hardware
Electronics (off-the-shelf)
Fasteners
Build materials & tools
- ›Structural epoxy — 3M DP460 or an equivalent two-part structural epoxy, for bonding the carbon arms
- ›Battery strap — to secure the LiPo
- ›Fine-tooth saw — hacksaw or razor saw (24+ TPI), for cutting the CF tubes
- ›Flat file — to square and deburr the cut tube ends
- ›Sandpaper — ~120–180 grit, for scuffing the bond surfaces
- ›Isopropyl alcohol (99%) & lint-free wipes — for cleaning bond surfaces
- ›Nitrile gloves & dust mask — carbon dust and uncured epoxy
Estimated cost
3D Printing
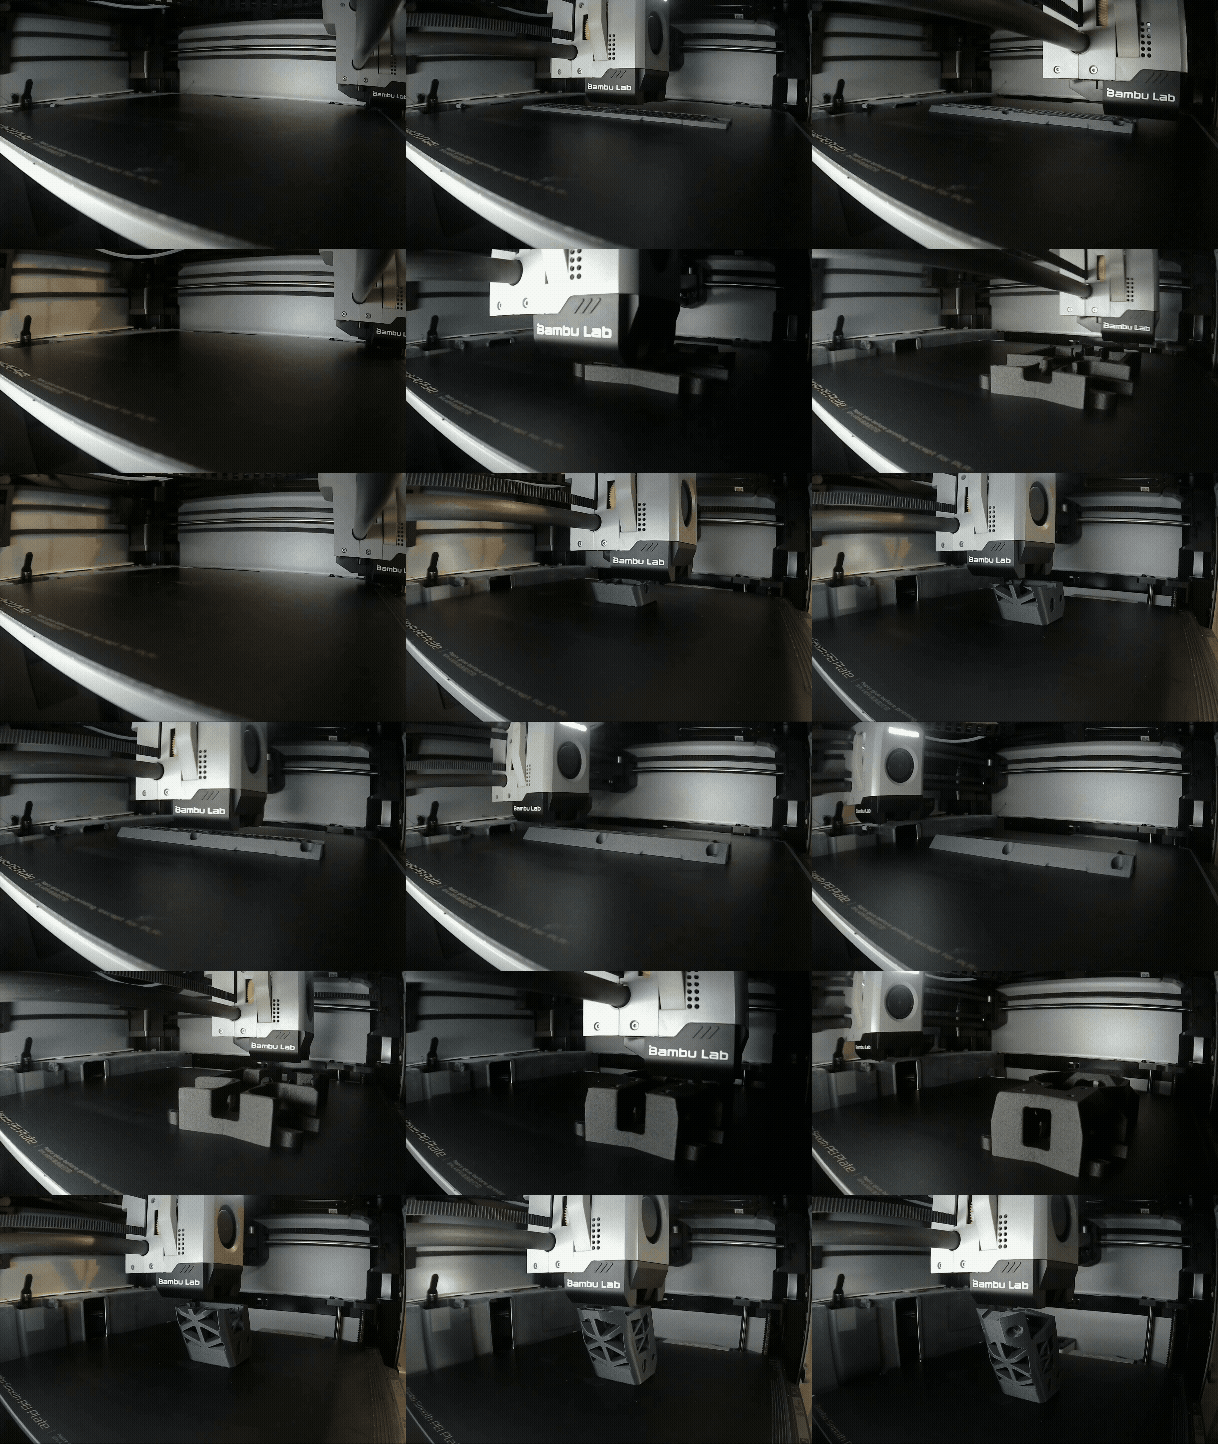
How to print a strong, dimensionally accurate Tejo chassis in CF-infused filament on a consumer printer.
Frame variants
The files include three ways to build the frame, so you can trade repairability against print-and-assembly simplicity. All three fly identically — pick the one that suits how you like to build.
- ›Separate arms (default) — each arm is its own part, bonded into the main chassis. The most repairable option: after a crash you reprint and swap a single arm without reprinting the whole frame.
- ›Single-part frame — the frame body prints as one piece, which makes manufacturing easier: fewer parts to print, align, and assemble.
- ›Single-part frame + rear — combines the frame further, merging the rear section into that same single piece for the simplest possible build.
Material & nozzle
- ›PPA-CF or PETG-CF filament, thoroughly dried — any high-performance CF-infused filament works with good rigidity
- ›0.4mm nozzle is optimal for quality; 0.6mm is also acceptable for the larger parts
- ›Hardened steel nozzle (CF-infused filament is abrasive)
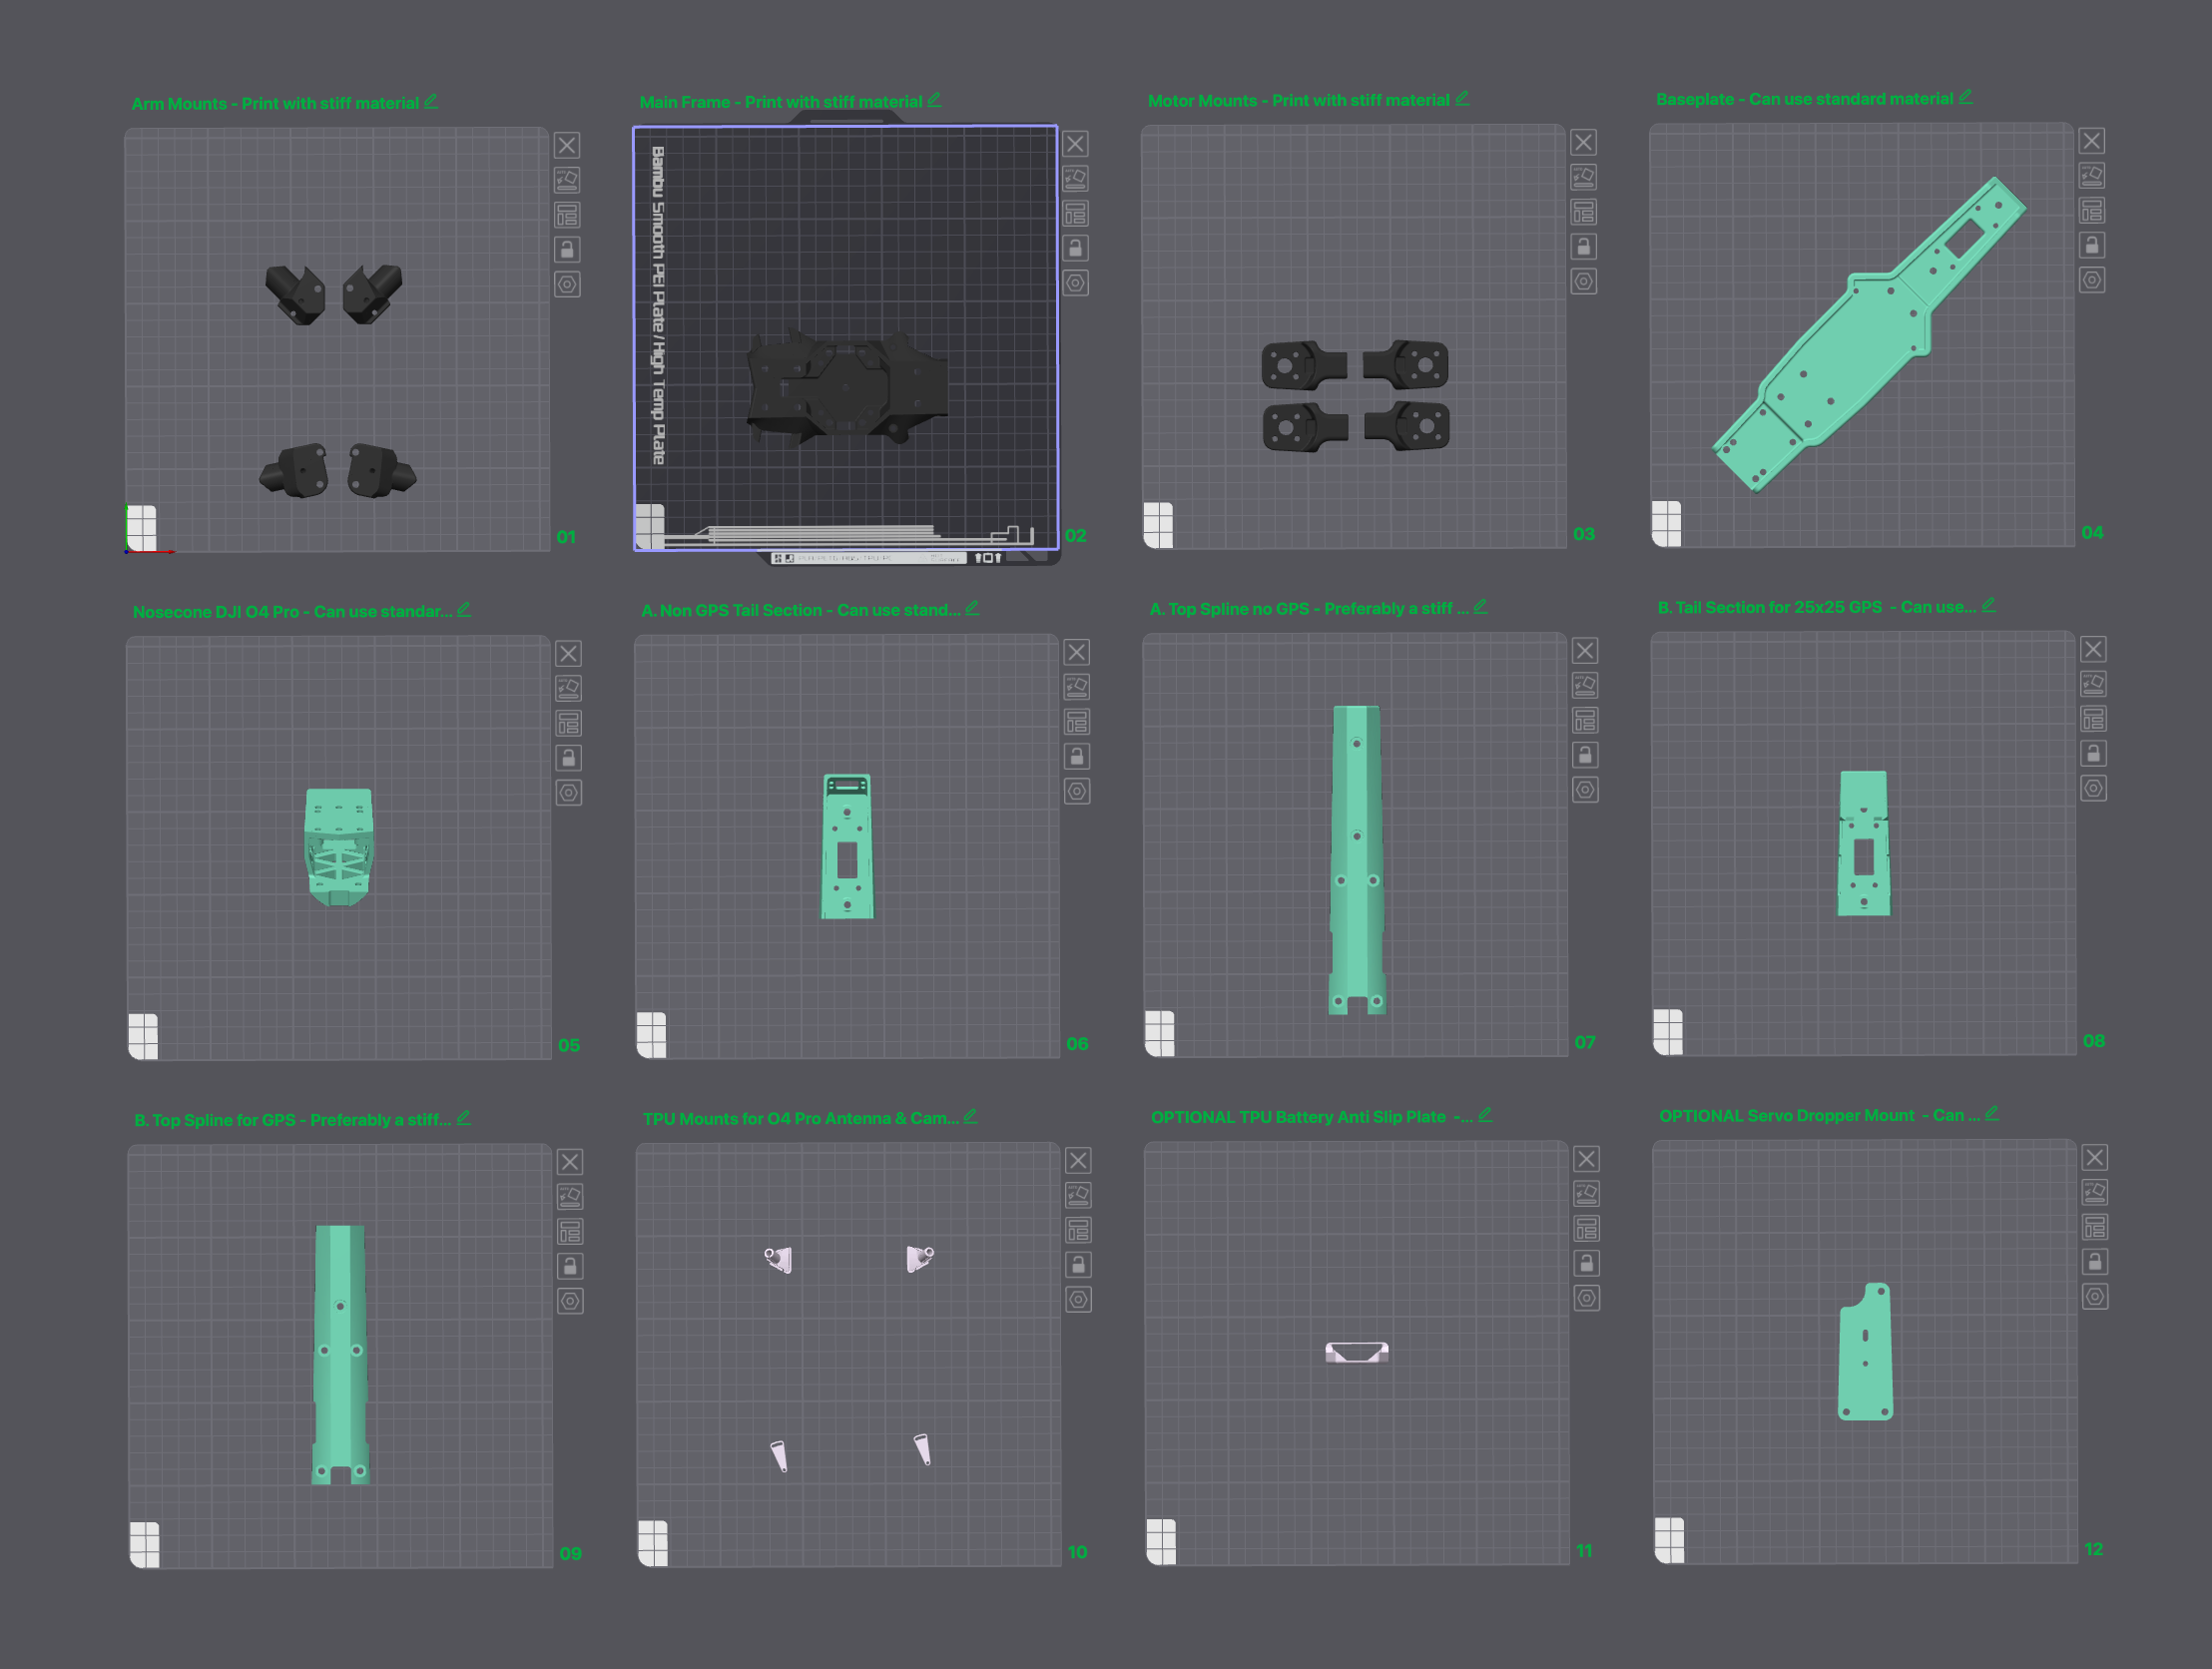
Material by part
Every part is labelled on the print plates with the material to use. The Tejo mixes stiff, standard, and flexible filaments by structural role — match each group to the guidance below.
Recommended slicer settings
Nozzle, bed, print speed, and cooling depend on your printer and filament — dial those in for your own setup. These are the structural settings that matter for a strong Tejo:
Orientation
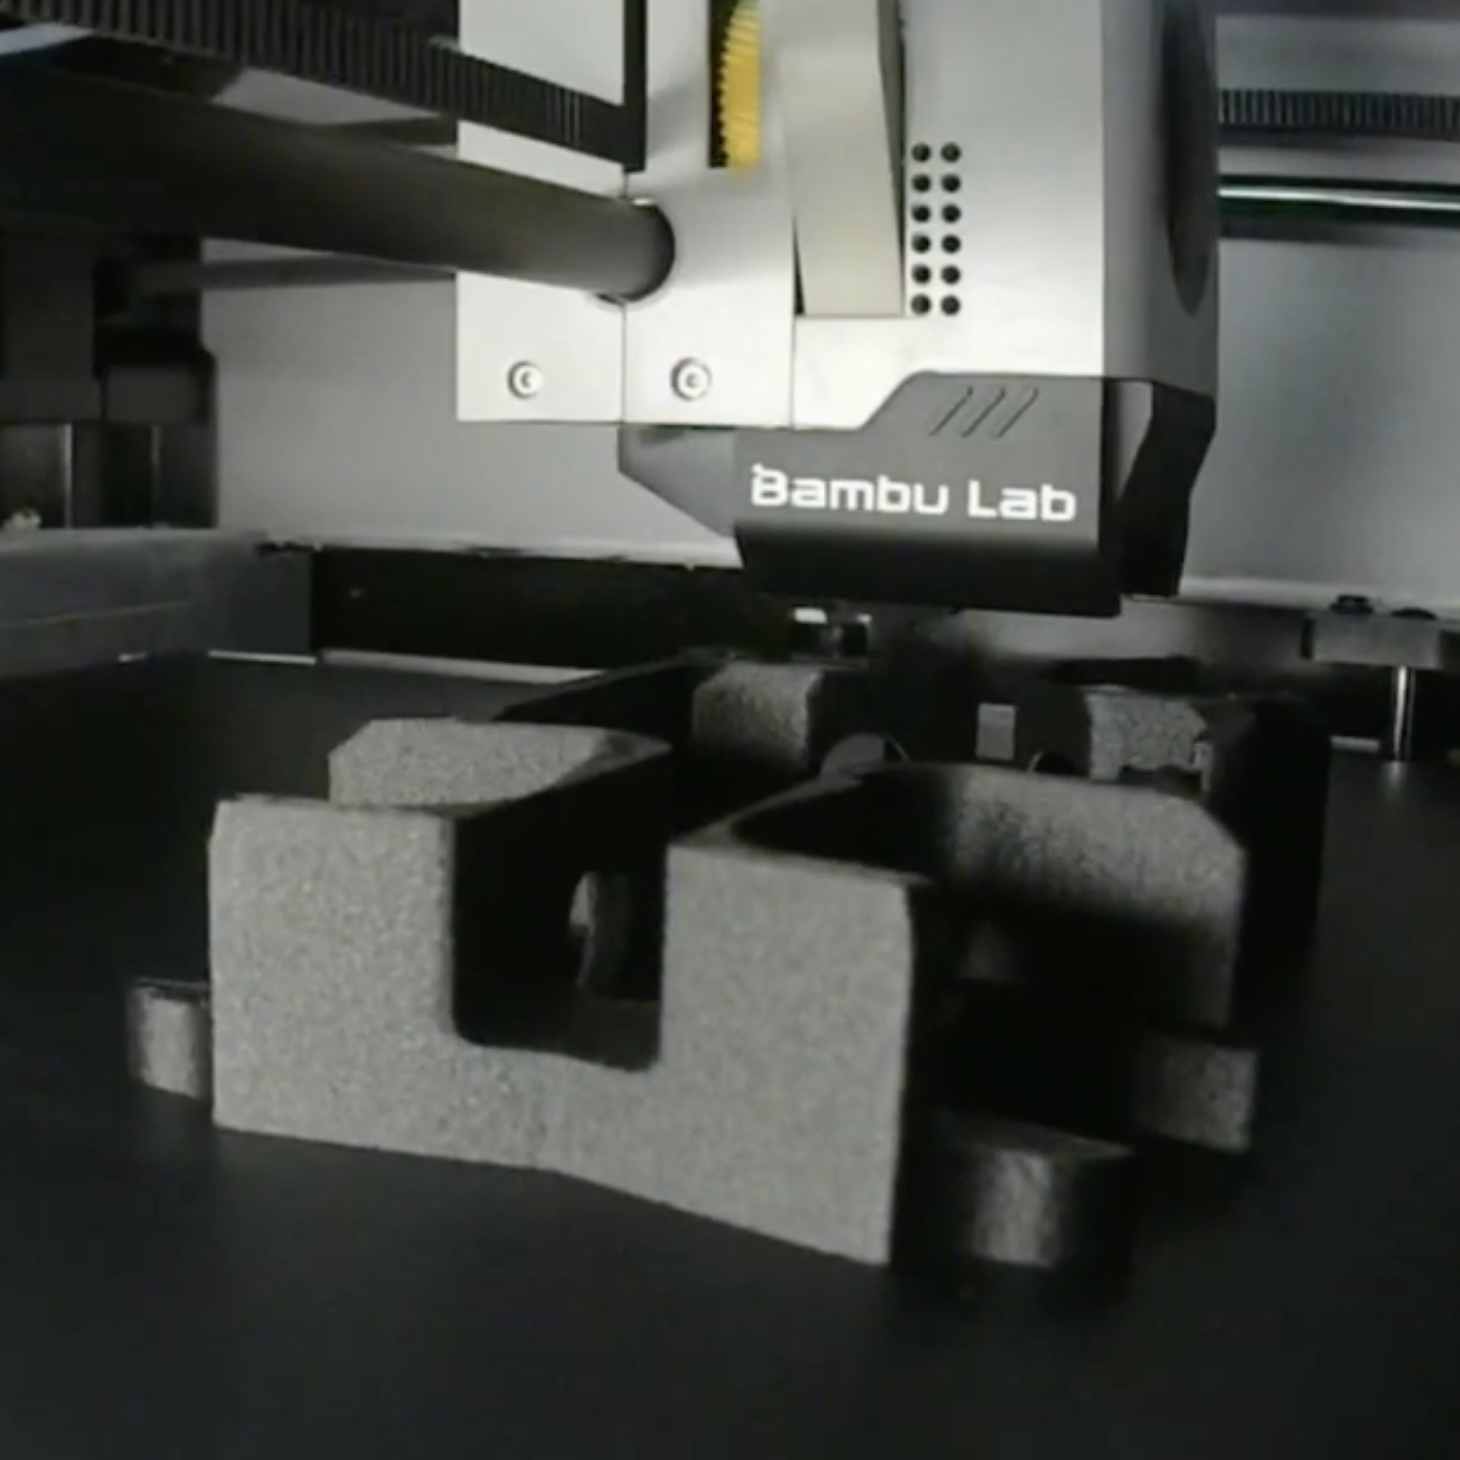
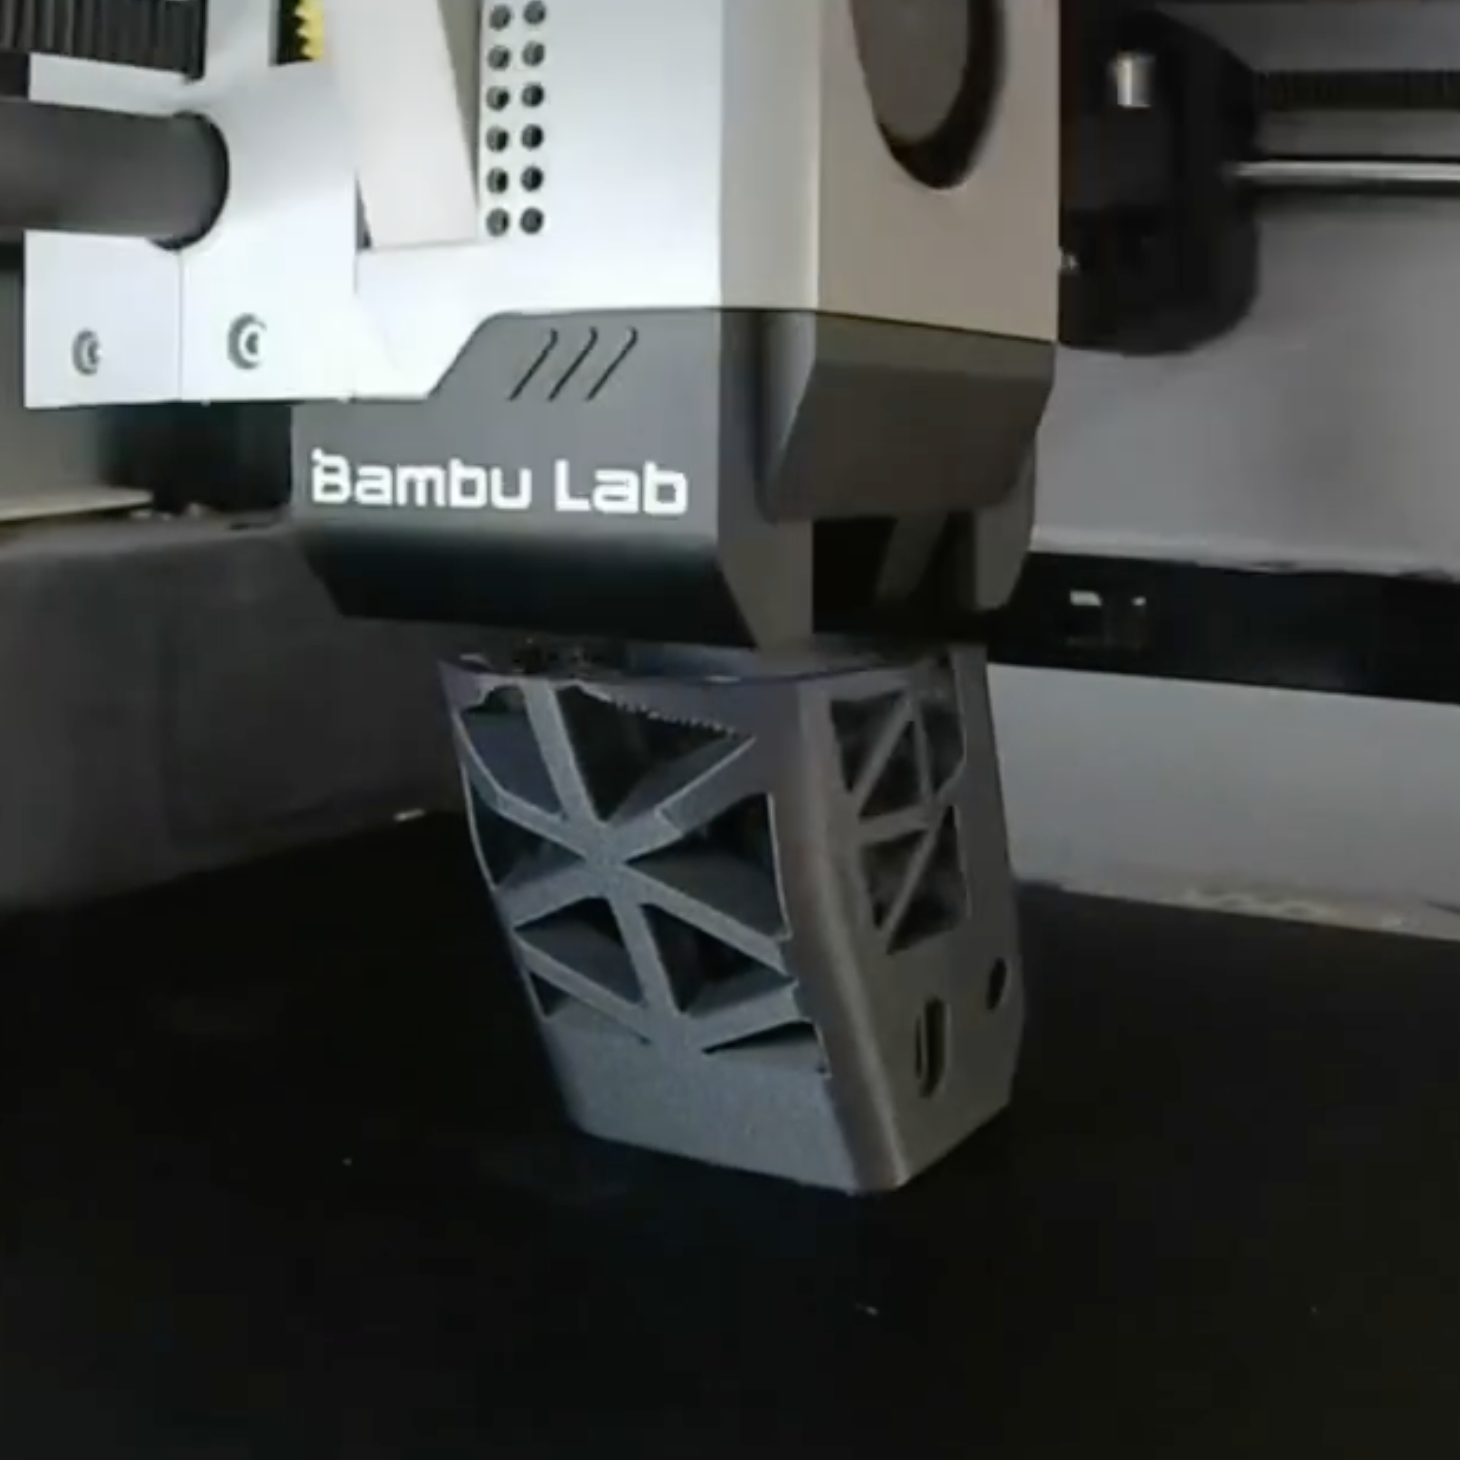
Print the main frame flat side down so the layer lines run perpendicular to the main stress axis — this aligns the strongest direction of the print with flight and crash loads. The nosecone prints at a 25° angle, which completely removes the need for support material.
Arm Bonding
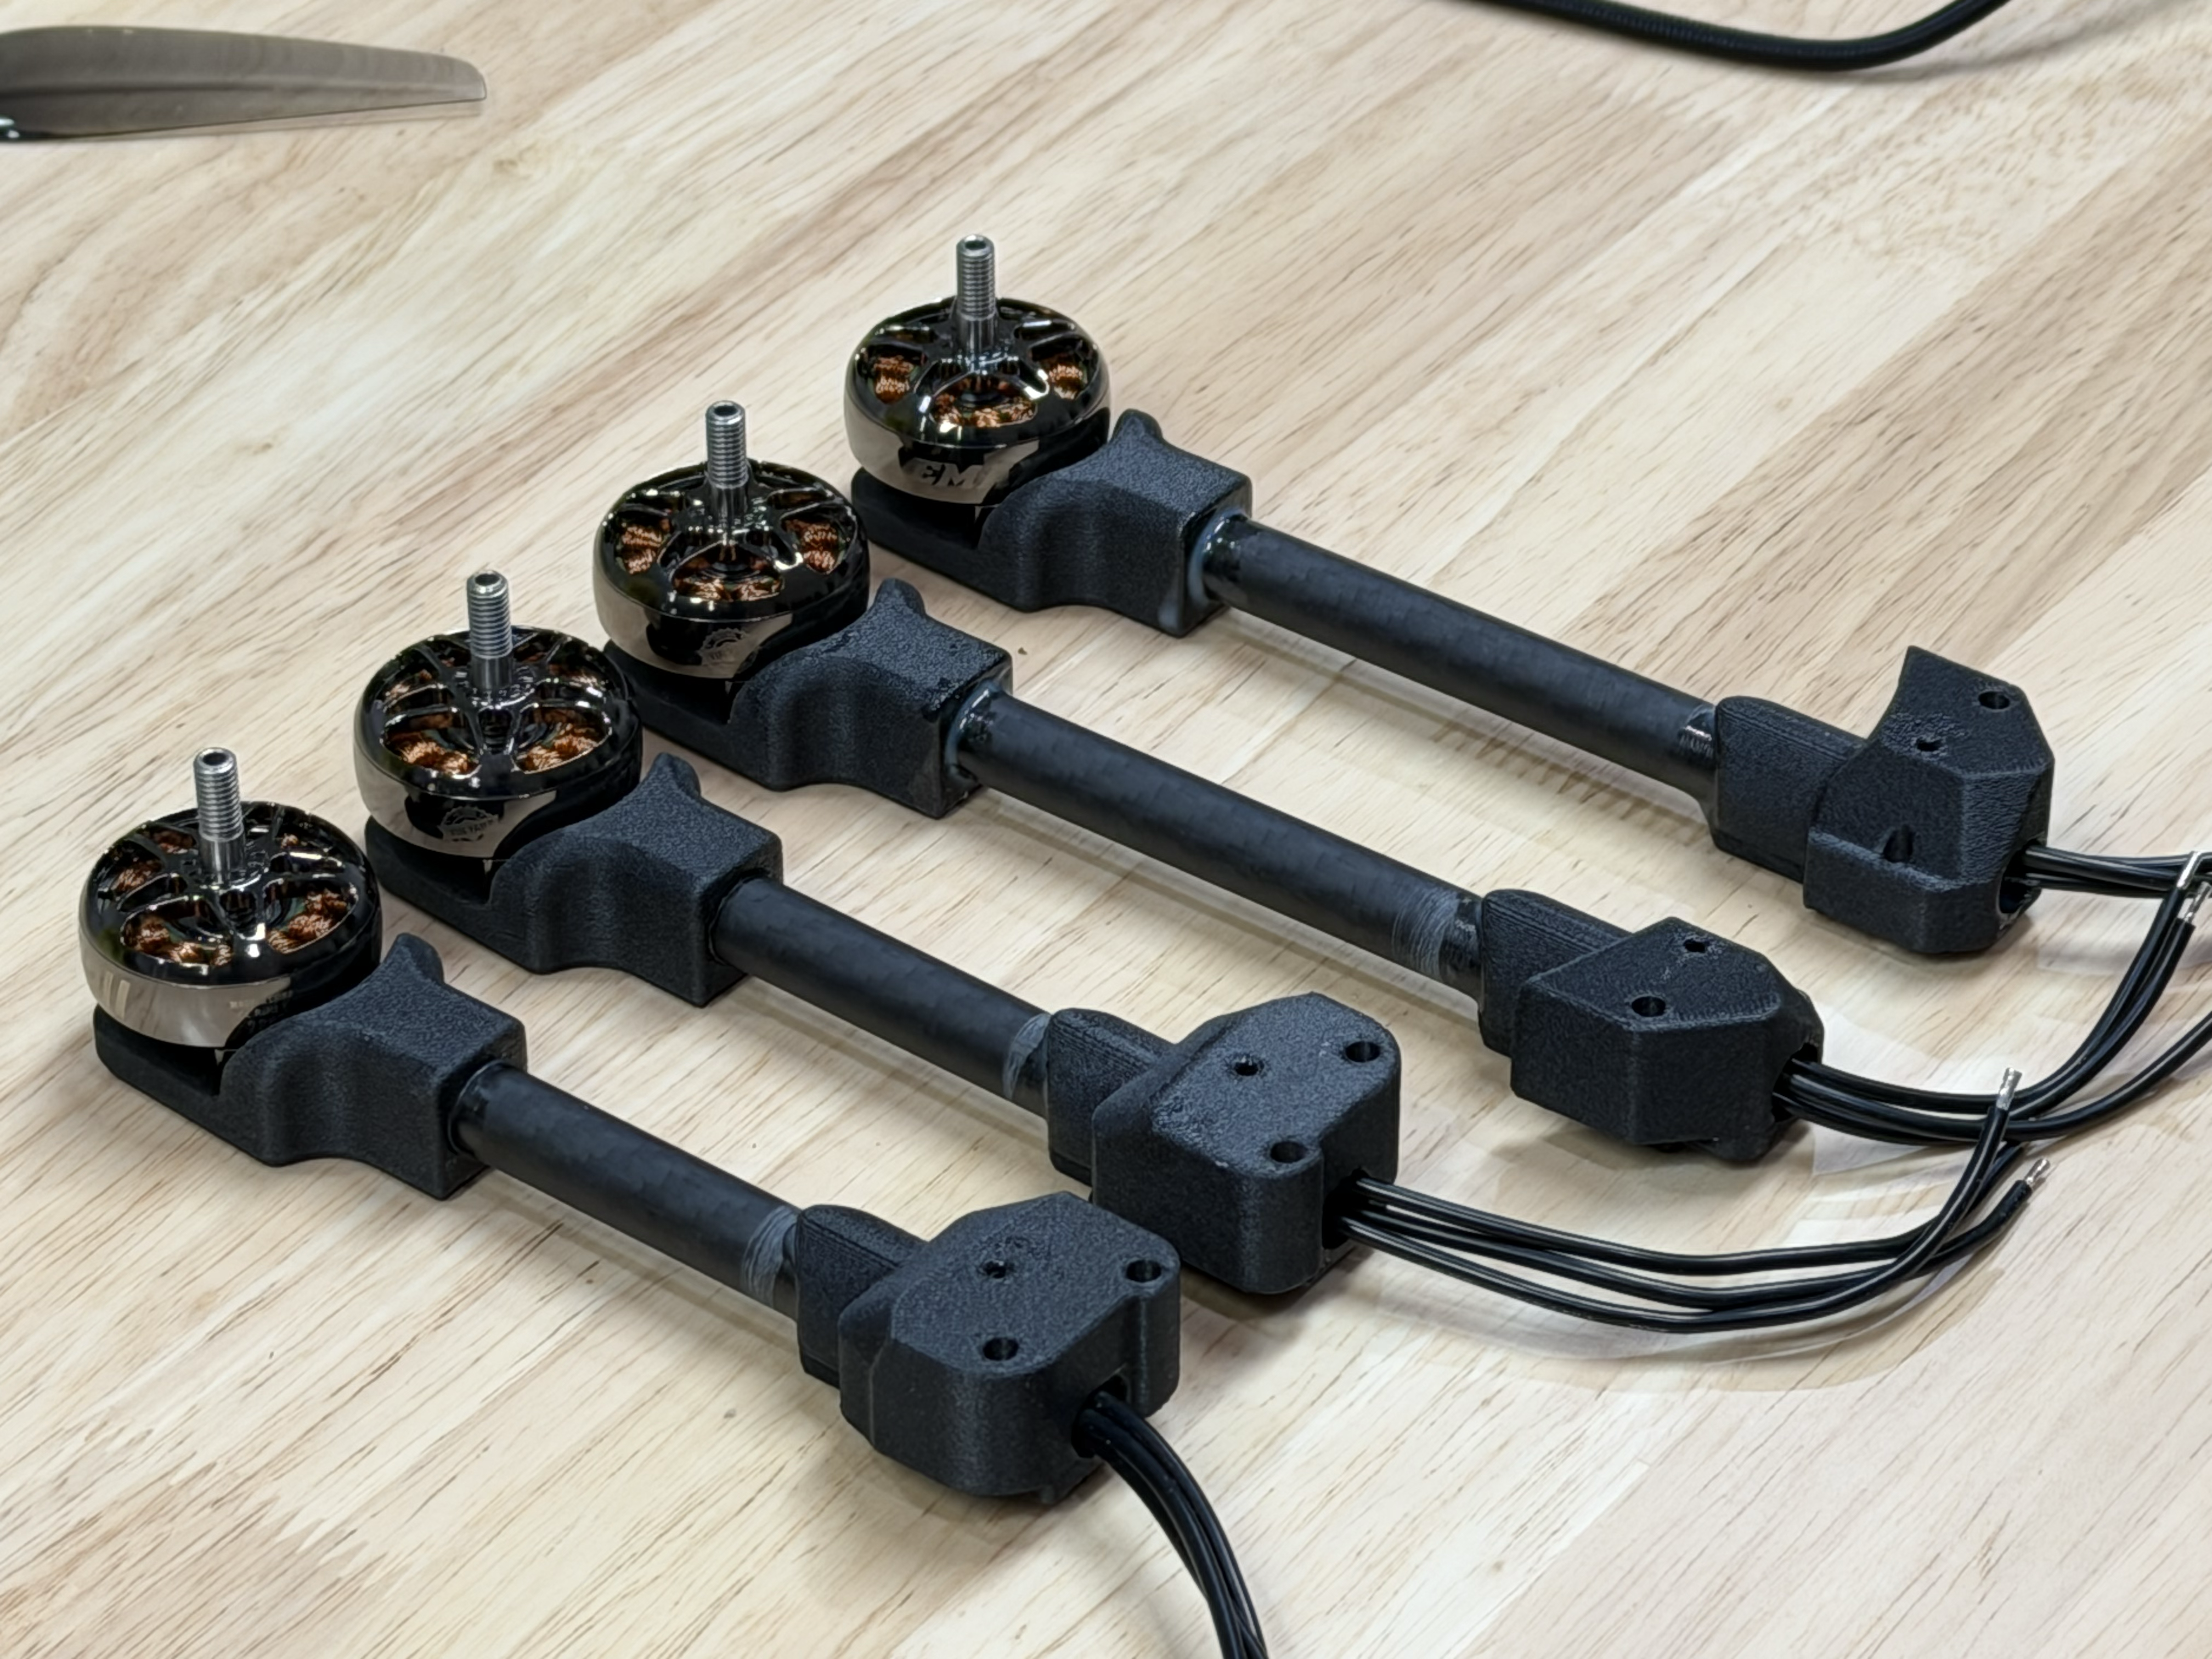
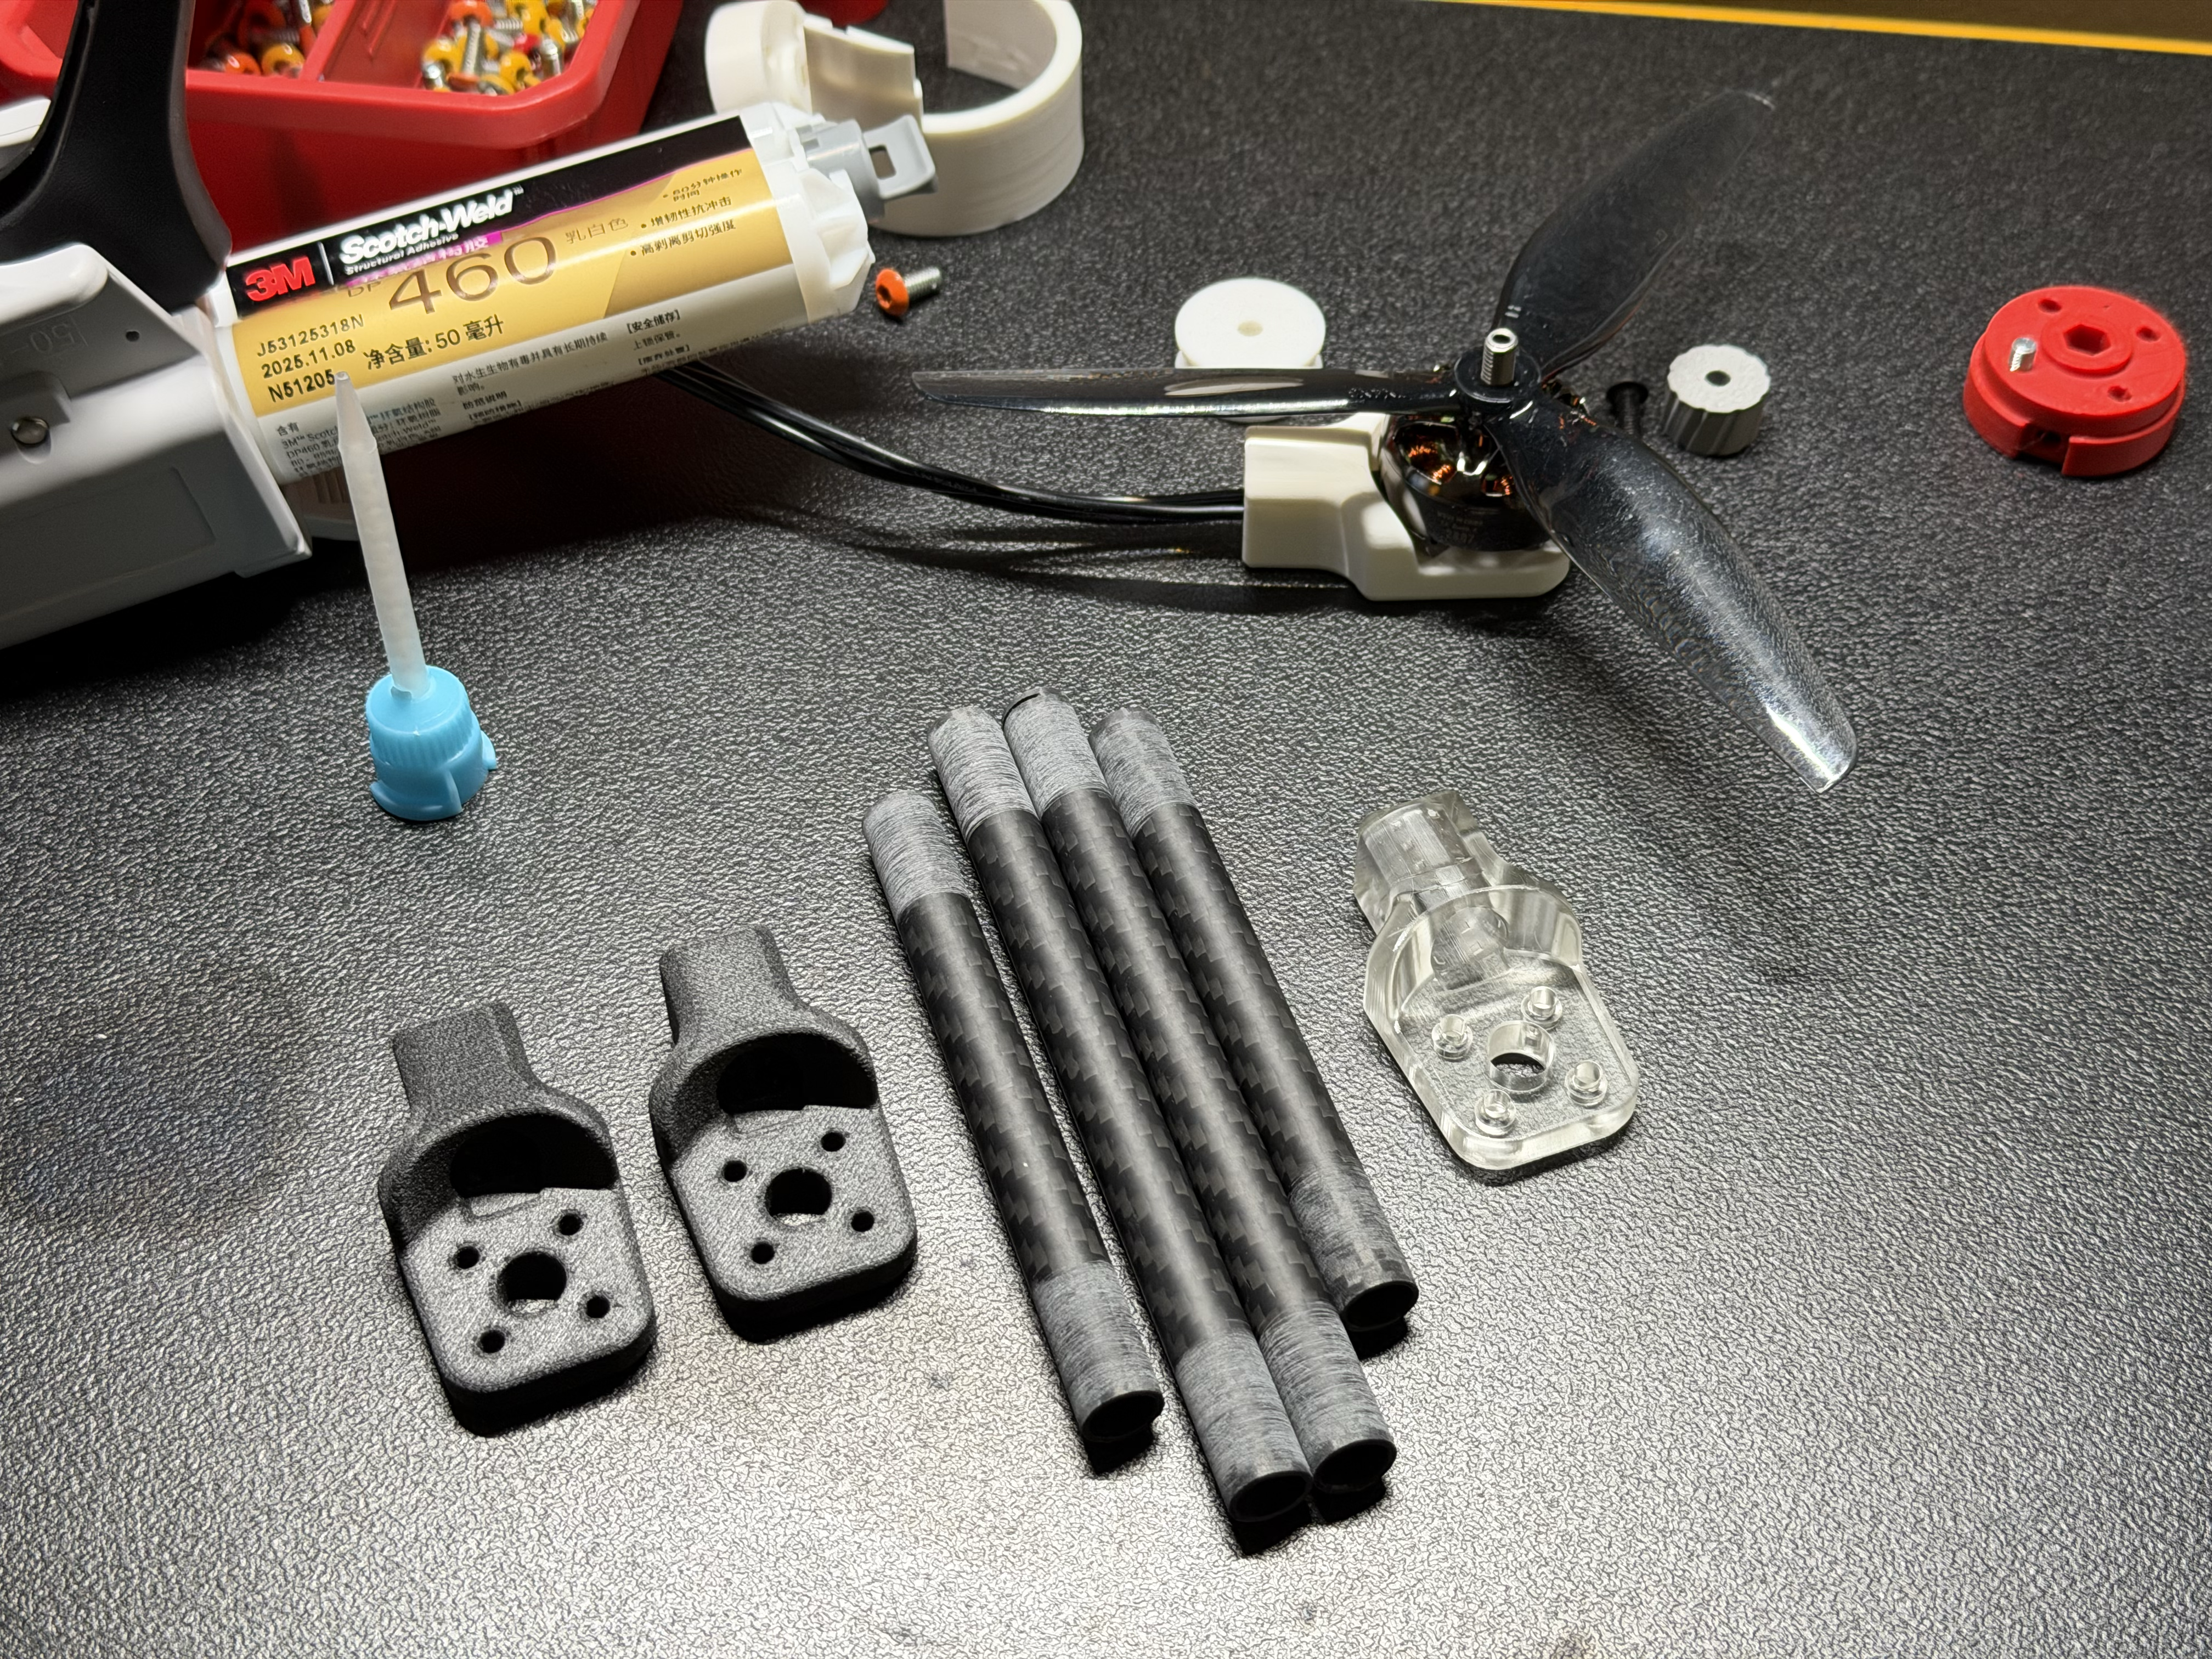
Bonding the carbon arms into the printed chassis with DP460 epoxy for rigid, precisely aligned joints.
What you need
- ›Carbon fiber arm tubes — 11 mm OD pultruded CF tube, any composites supplier
- ›3M DP460 structural epoxy + mixing nozzle — or any comparable two-part structural epoxy. Gorilla Glue and other brands work just as well, as does another 3M structural epoxy such as DP420
- ›Isopropyl alcohol (99%) and lint-free wipes
- ›Sandpaper, ~120–180 grit, for scuffing the bond surfaces
- ›Fine-tooth saw (hacksaw or razor saw, 24+ TPI) for cutting the tubes
- ›CF tube cutting fixture (free download below)
- ›Dust mask and nitrile gloves — carbon dust and uncured epoxy
Arm lengths — 7-inch build
Both arms are 11 mm diameter carbon fiber tube. Cut them to the lengths below for this 7-inch Tejo build:
Procedure
- ›Cut the CF tubes to length with the fine-tooth saw and cutting fixture
- ›Scuff and clean both the carbon and printed mating surfaces
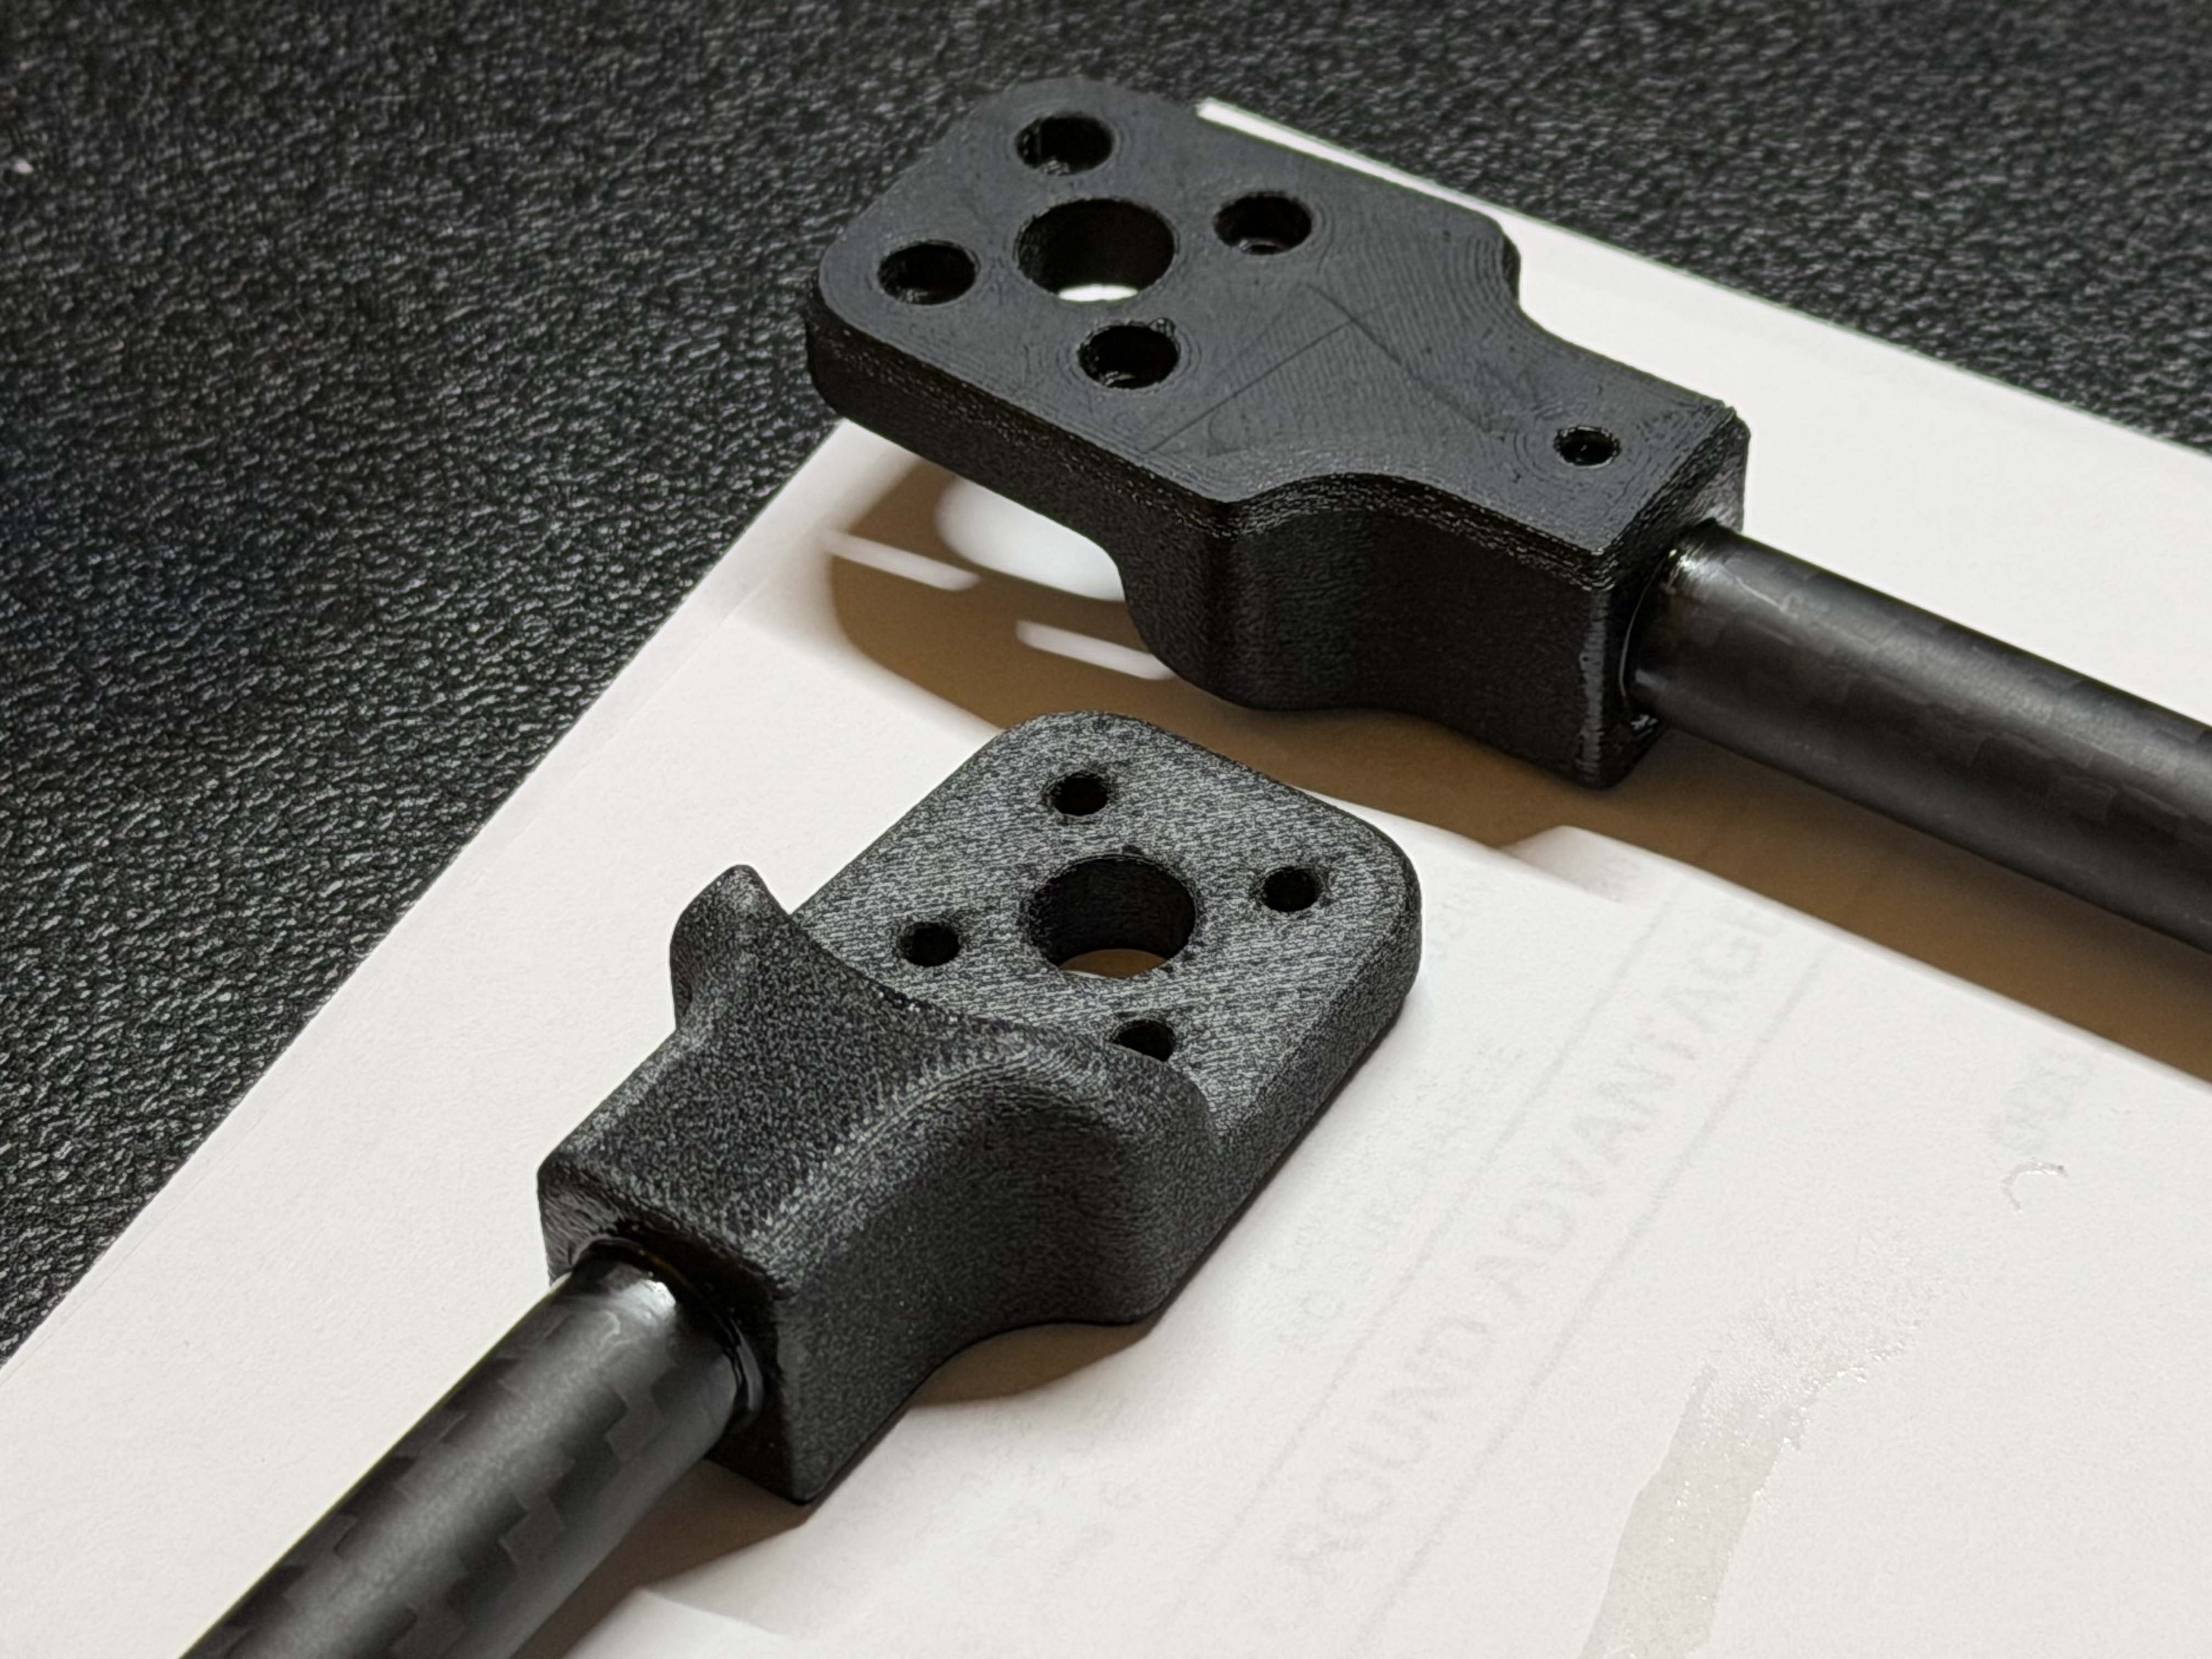
- ›Seat the CF arm fully into its chassis mount
- ›Mix the epoxy and inject it into the dedicated epoxy ports — the arm mounts have specific engineered epoxy channels designed in, so the epoxy feeds straight into the joint instead of being smeared onto the arm root
- ›While injecting, periodically spin the CF tube inside the mount so the epoxy spreads evenly all the way around the joint, then leave it to cure undisturbed for 24h at room temperature — no clamps required
Assembly
Bringing the bonded frame, electronics stack, and payload bay together into a flight-ready Tejo.
Build order
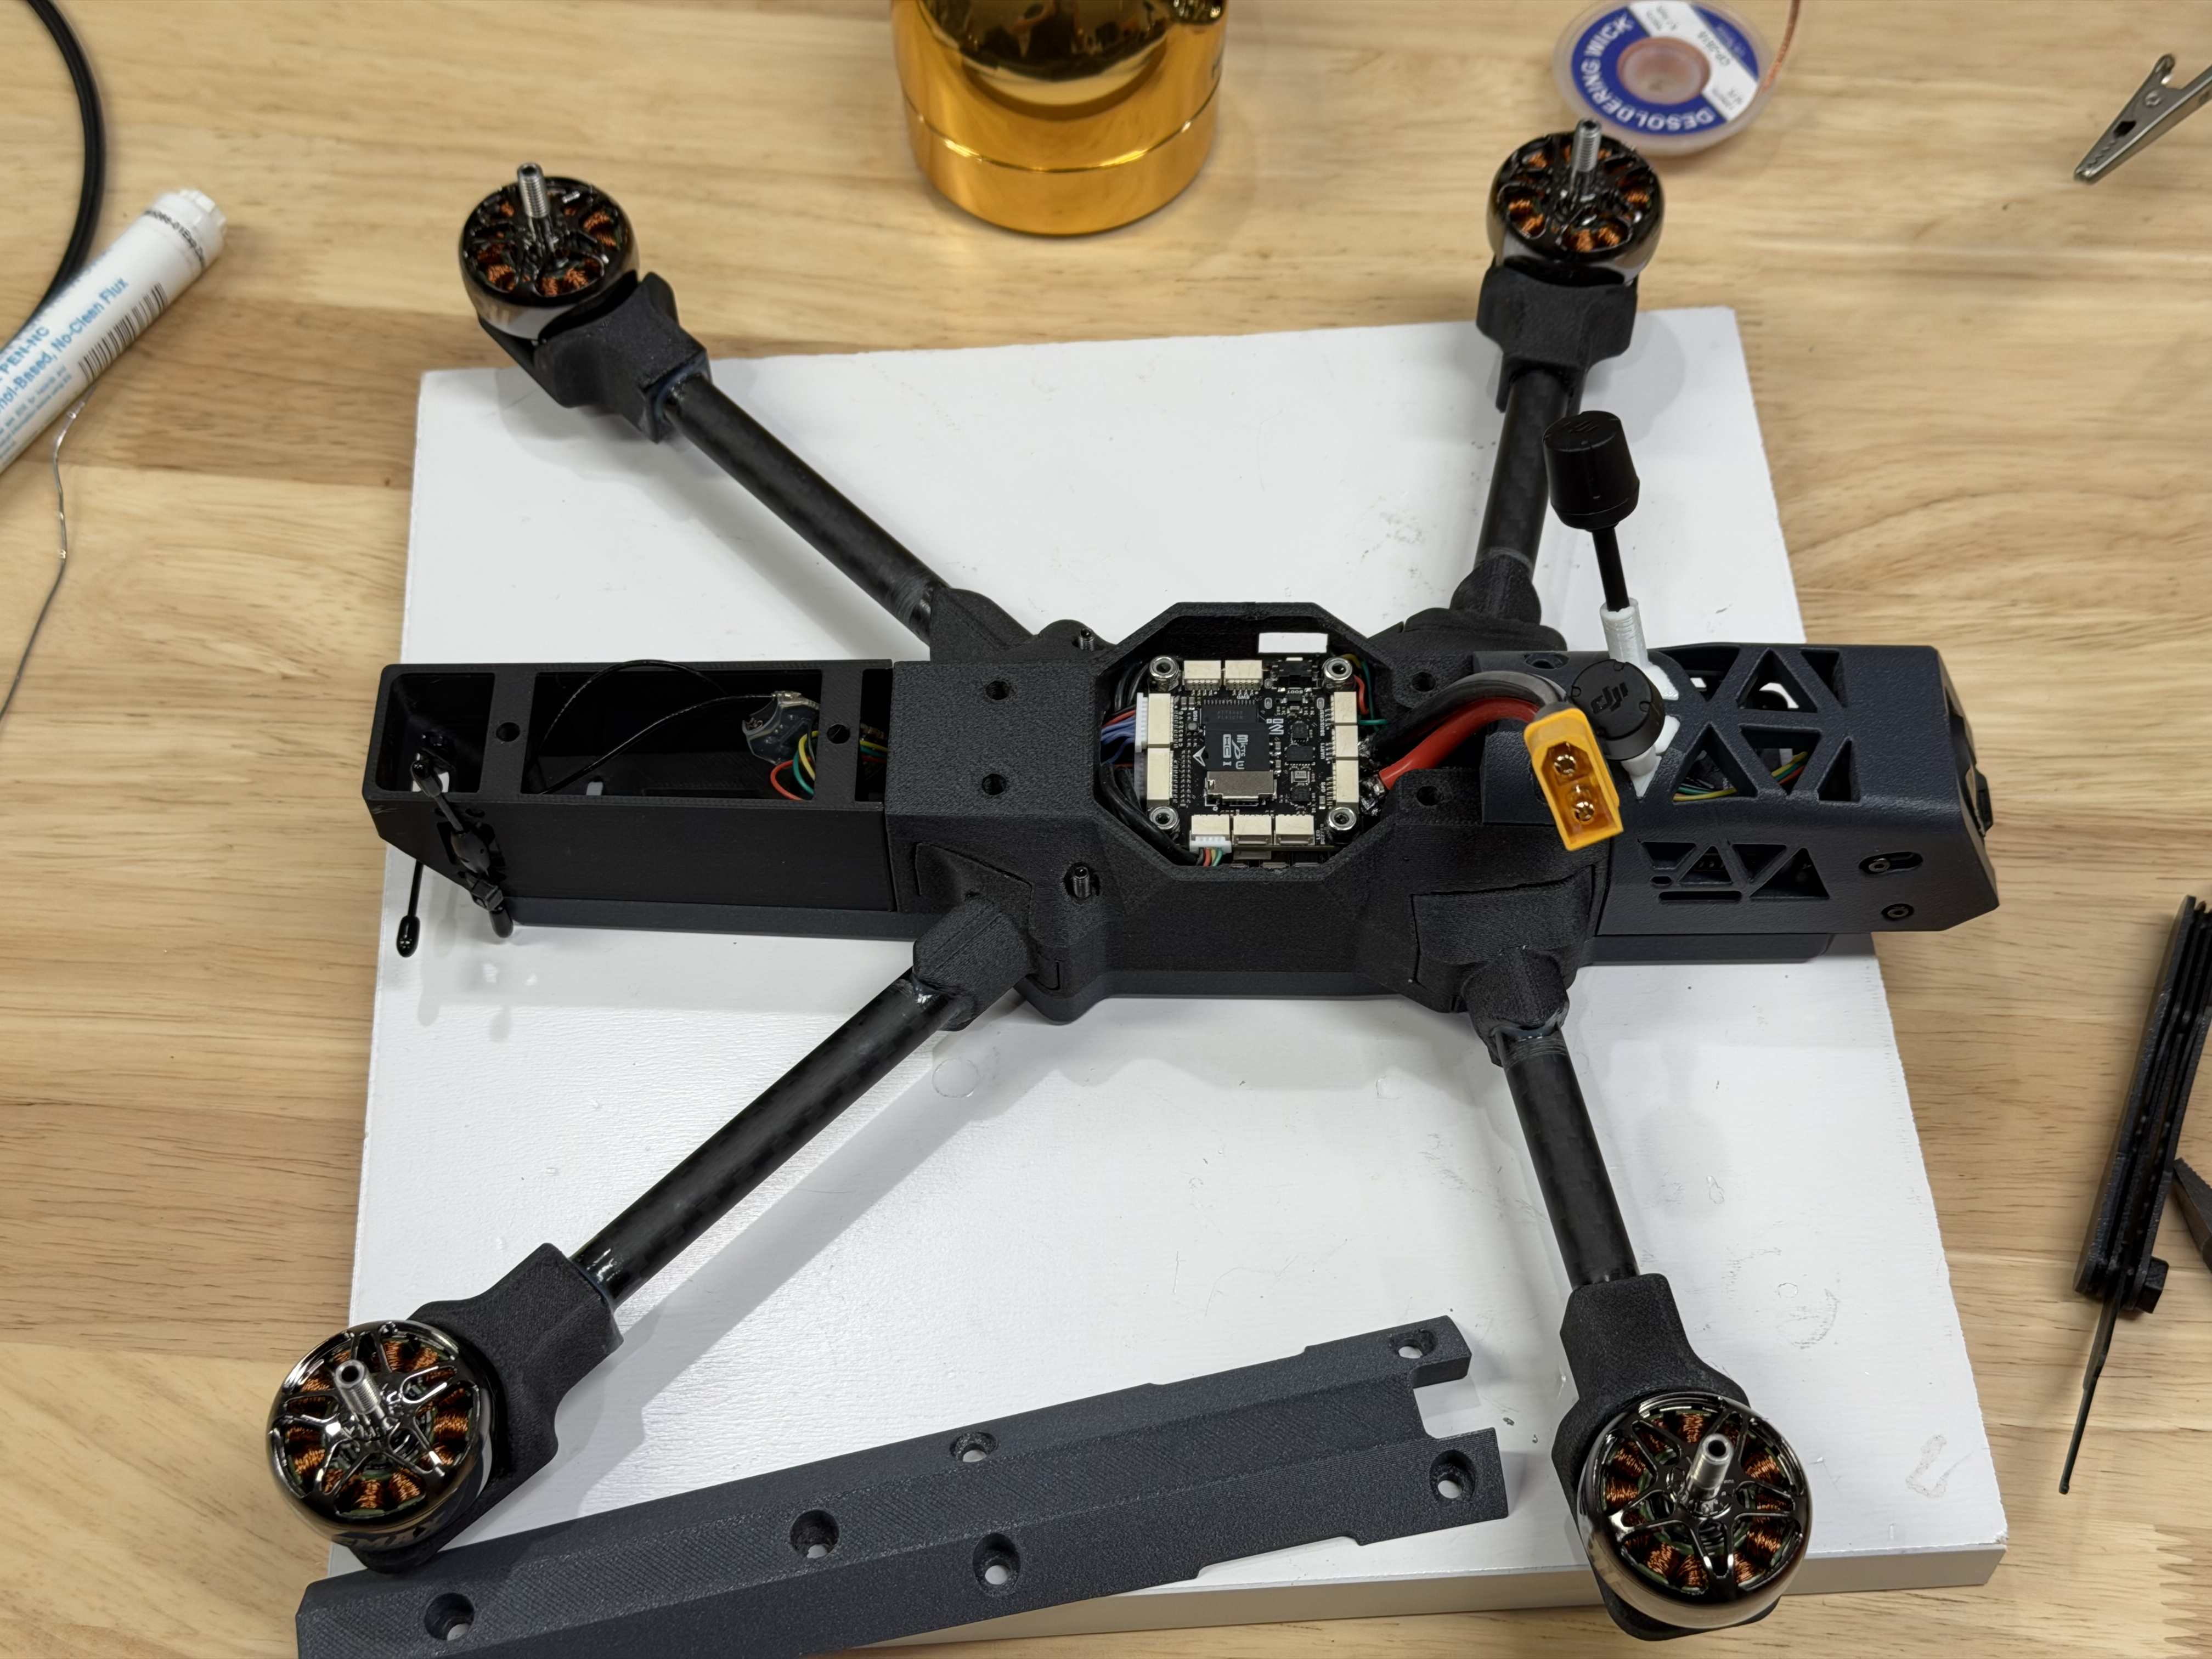
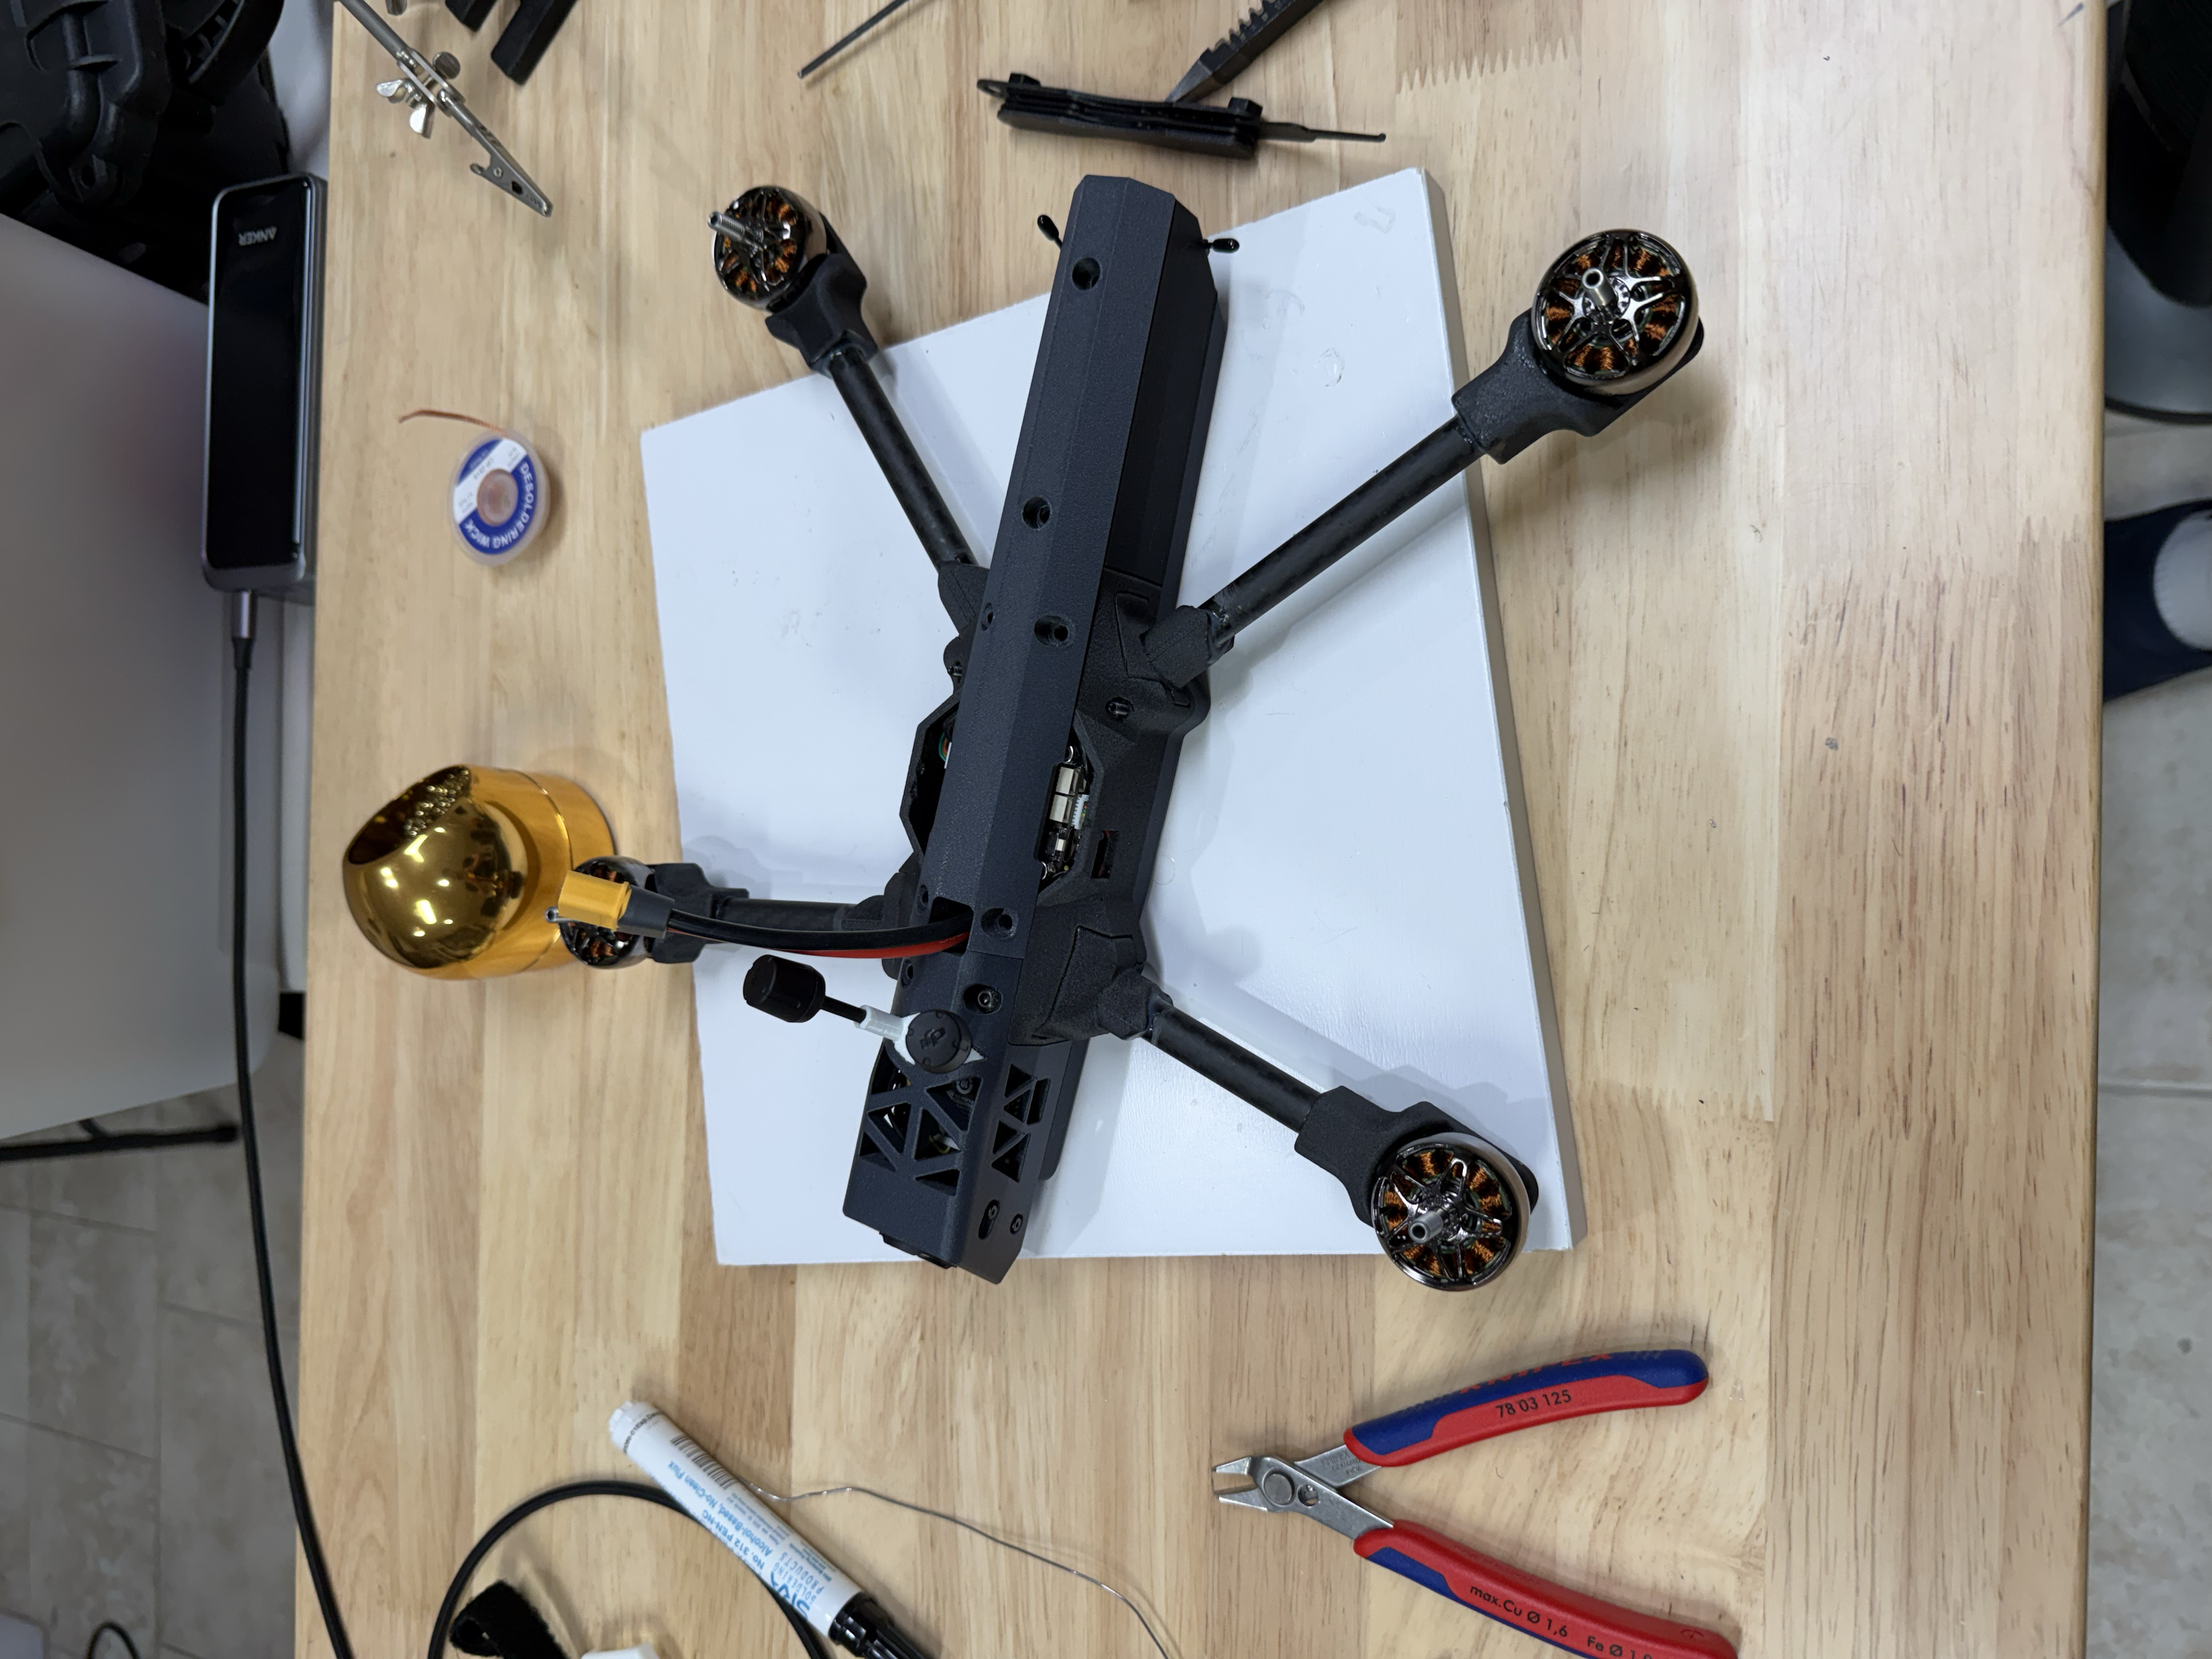
- ›Mount the FC & ESC stack on soft mounts (30×30 or 20×20) and route motor leads
- ›Install the camera and VTX in the front cage — DJI O4 Pro or O4 Lite, using the matching camera mount from the bundle
- ›Mount the ELRS receiver and run its antennas into the non-CF tail section
- ›If you're flying GPS, fit the module (25×25, e.g. MicoAir MG-A01) to the GPS top spline
- ›Fit the payload bay
- ›Strap in your LiPo — 6S or your preferred pack — and close the canopy
Torque reference
Stack orientation
On most stacks the battery power leads exit the rear of the board. In the configuration I fly, the stack is turned 180° so those leads come out the front instead — which also puts the capacitor at the front end, near the nosecone. Motor lead routing and the Betaflight yaw setting change accordingly, so set the board orientation in the configurator to match.
Next: Firmware ›Firmware
The Tejo runs on Betaflight, flashed to the MicoAir743 V2 stack.
Firmware
My build runs Betaflight on the MicoAir743 V2 (AM32 70A) stack, with a RadioMaster RP4TD-M ELRS 2.4 GHz receiver and a DJI O4 air unit for video and OSD. Flashing steps and tuning vary by the stack and components you choose, so follow your own hardware’s documentation rather than a one-size-fits-all guide here.
Payload Bay
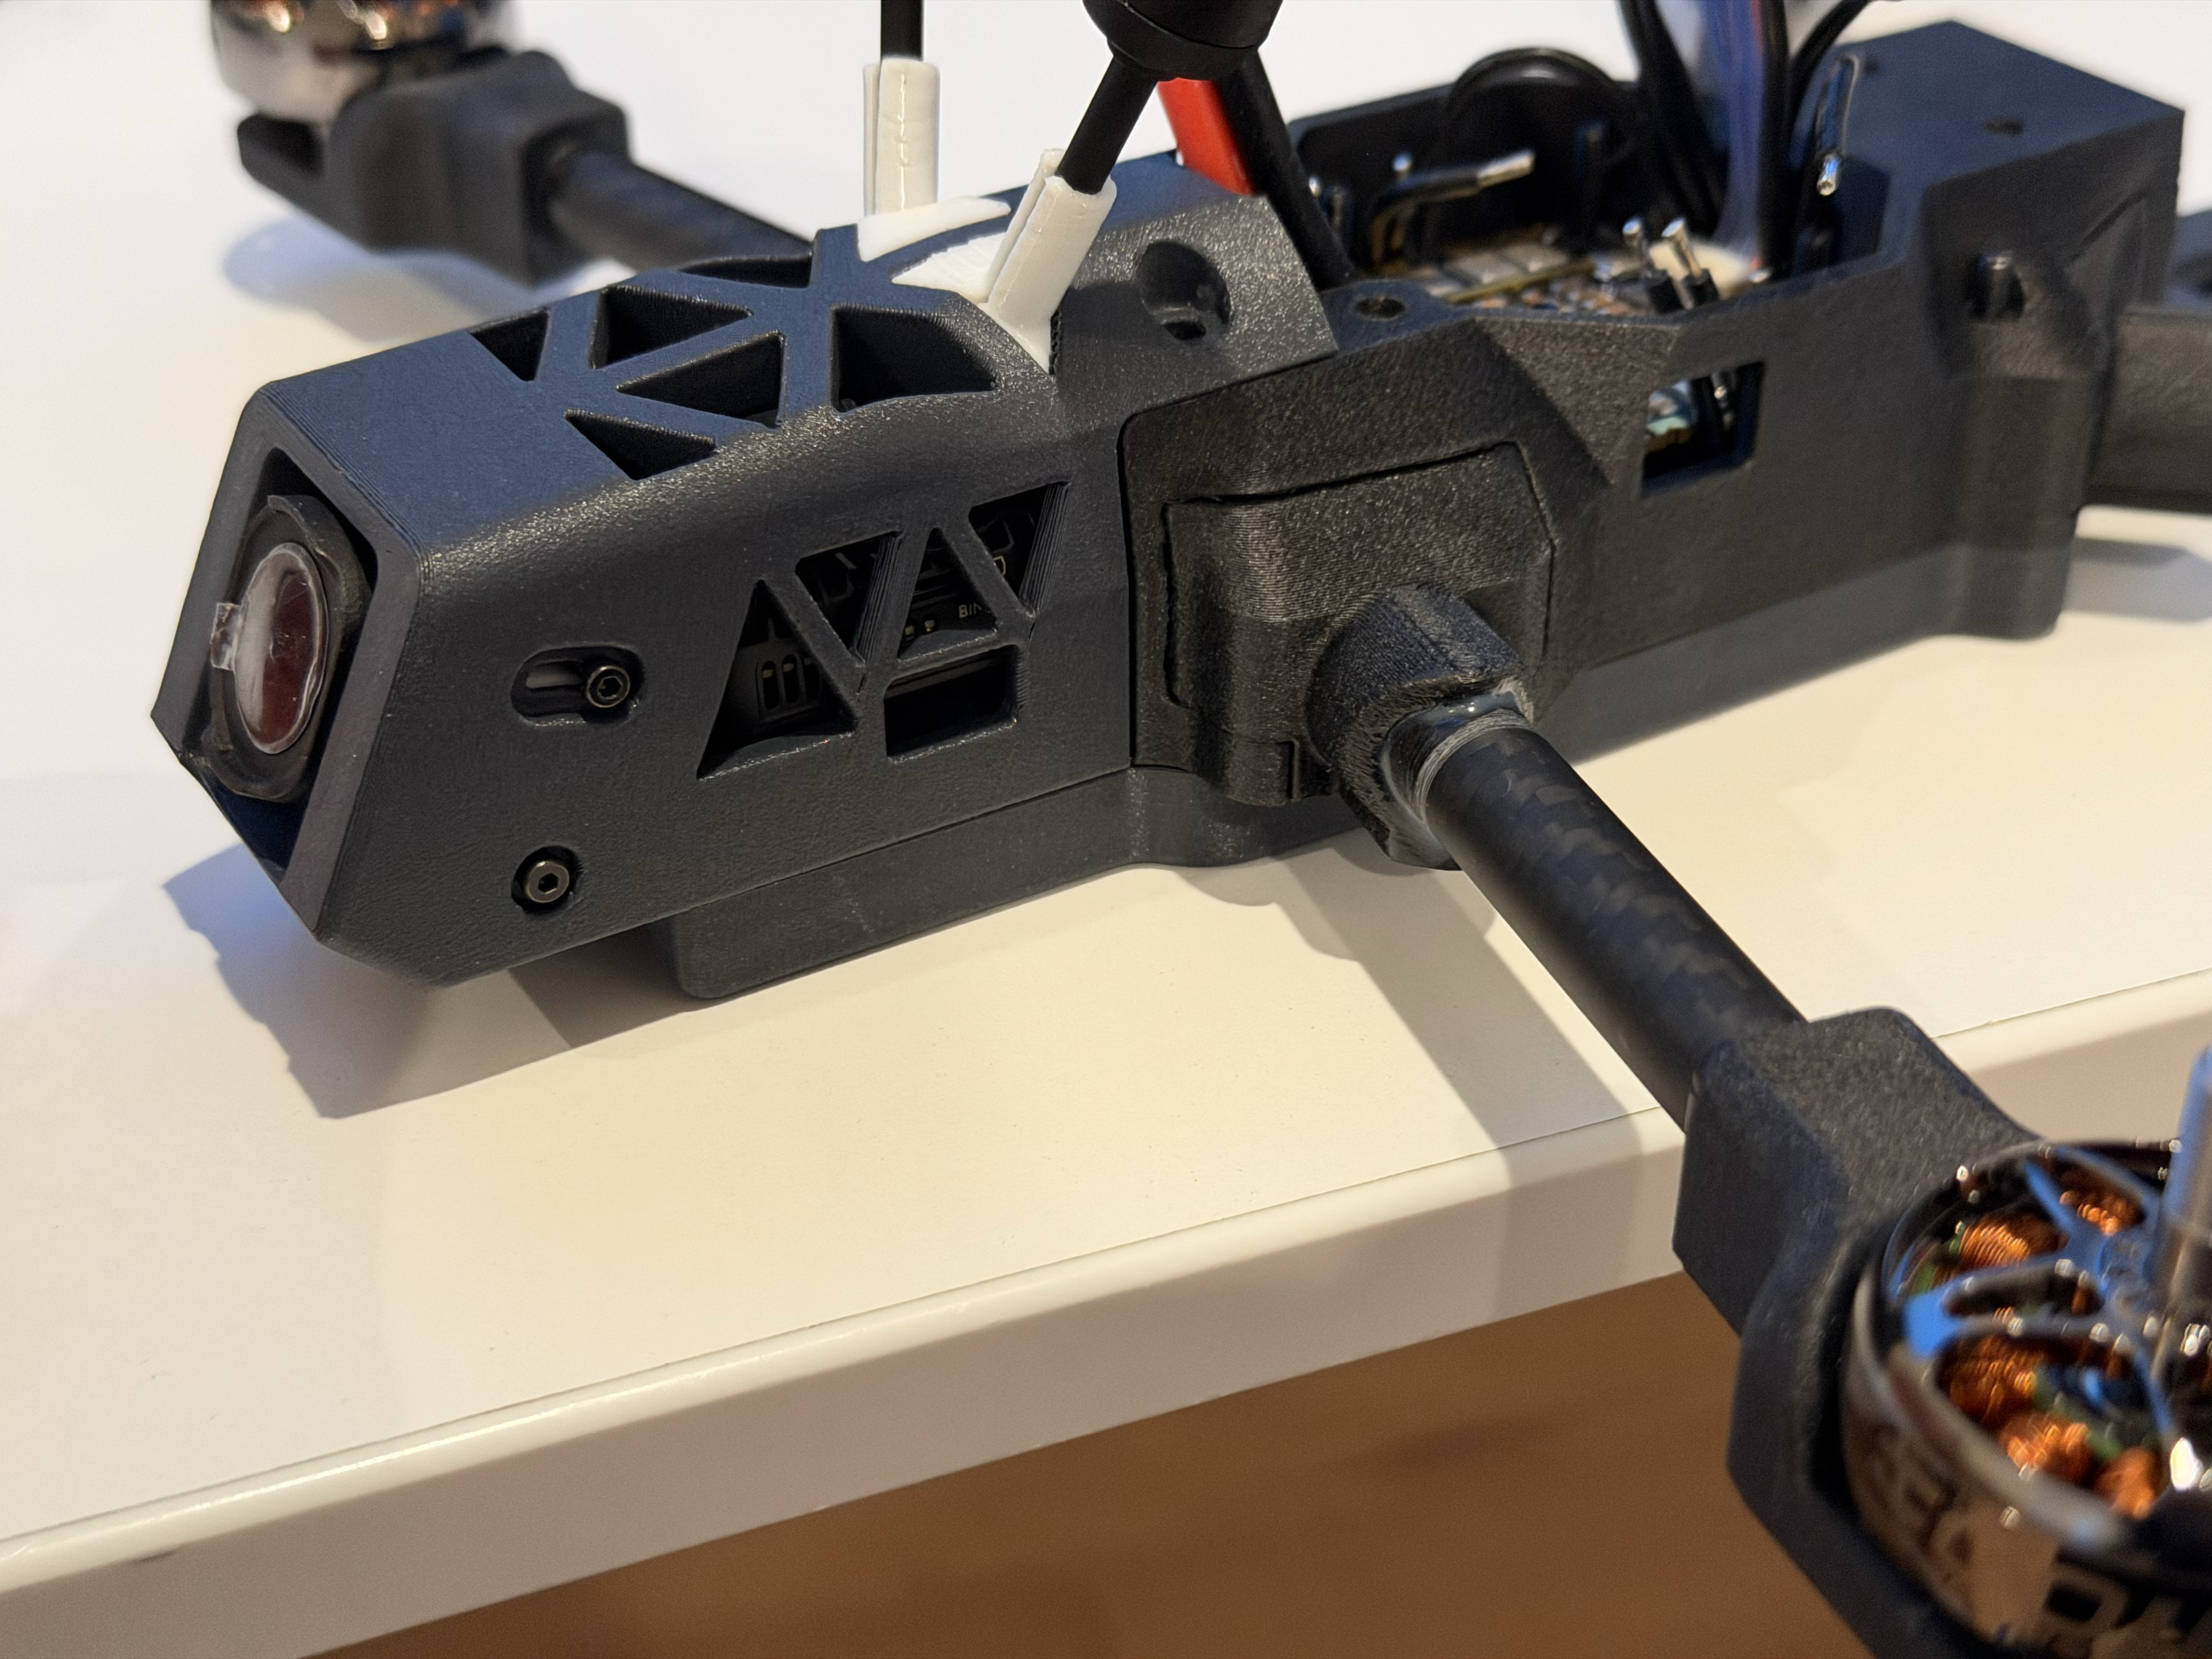
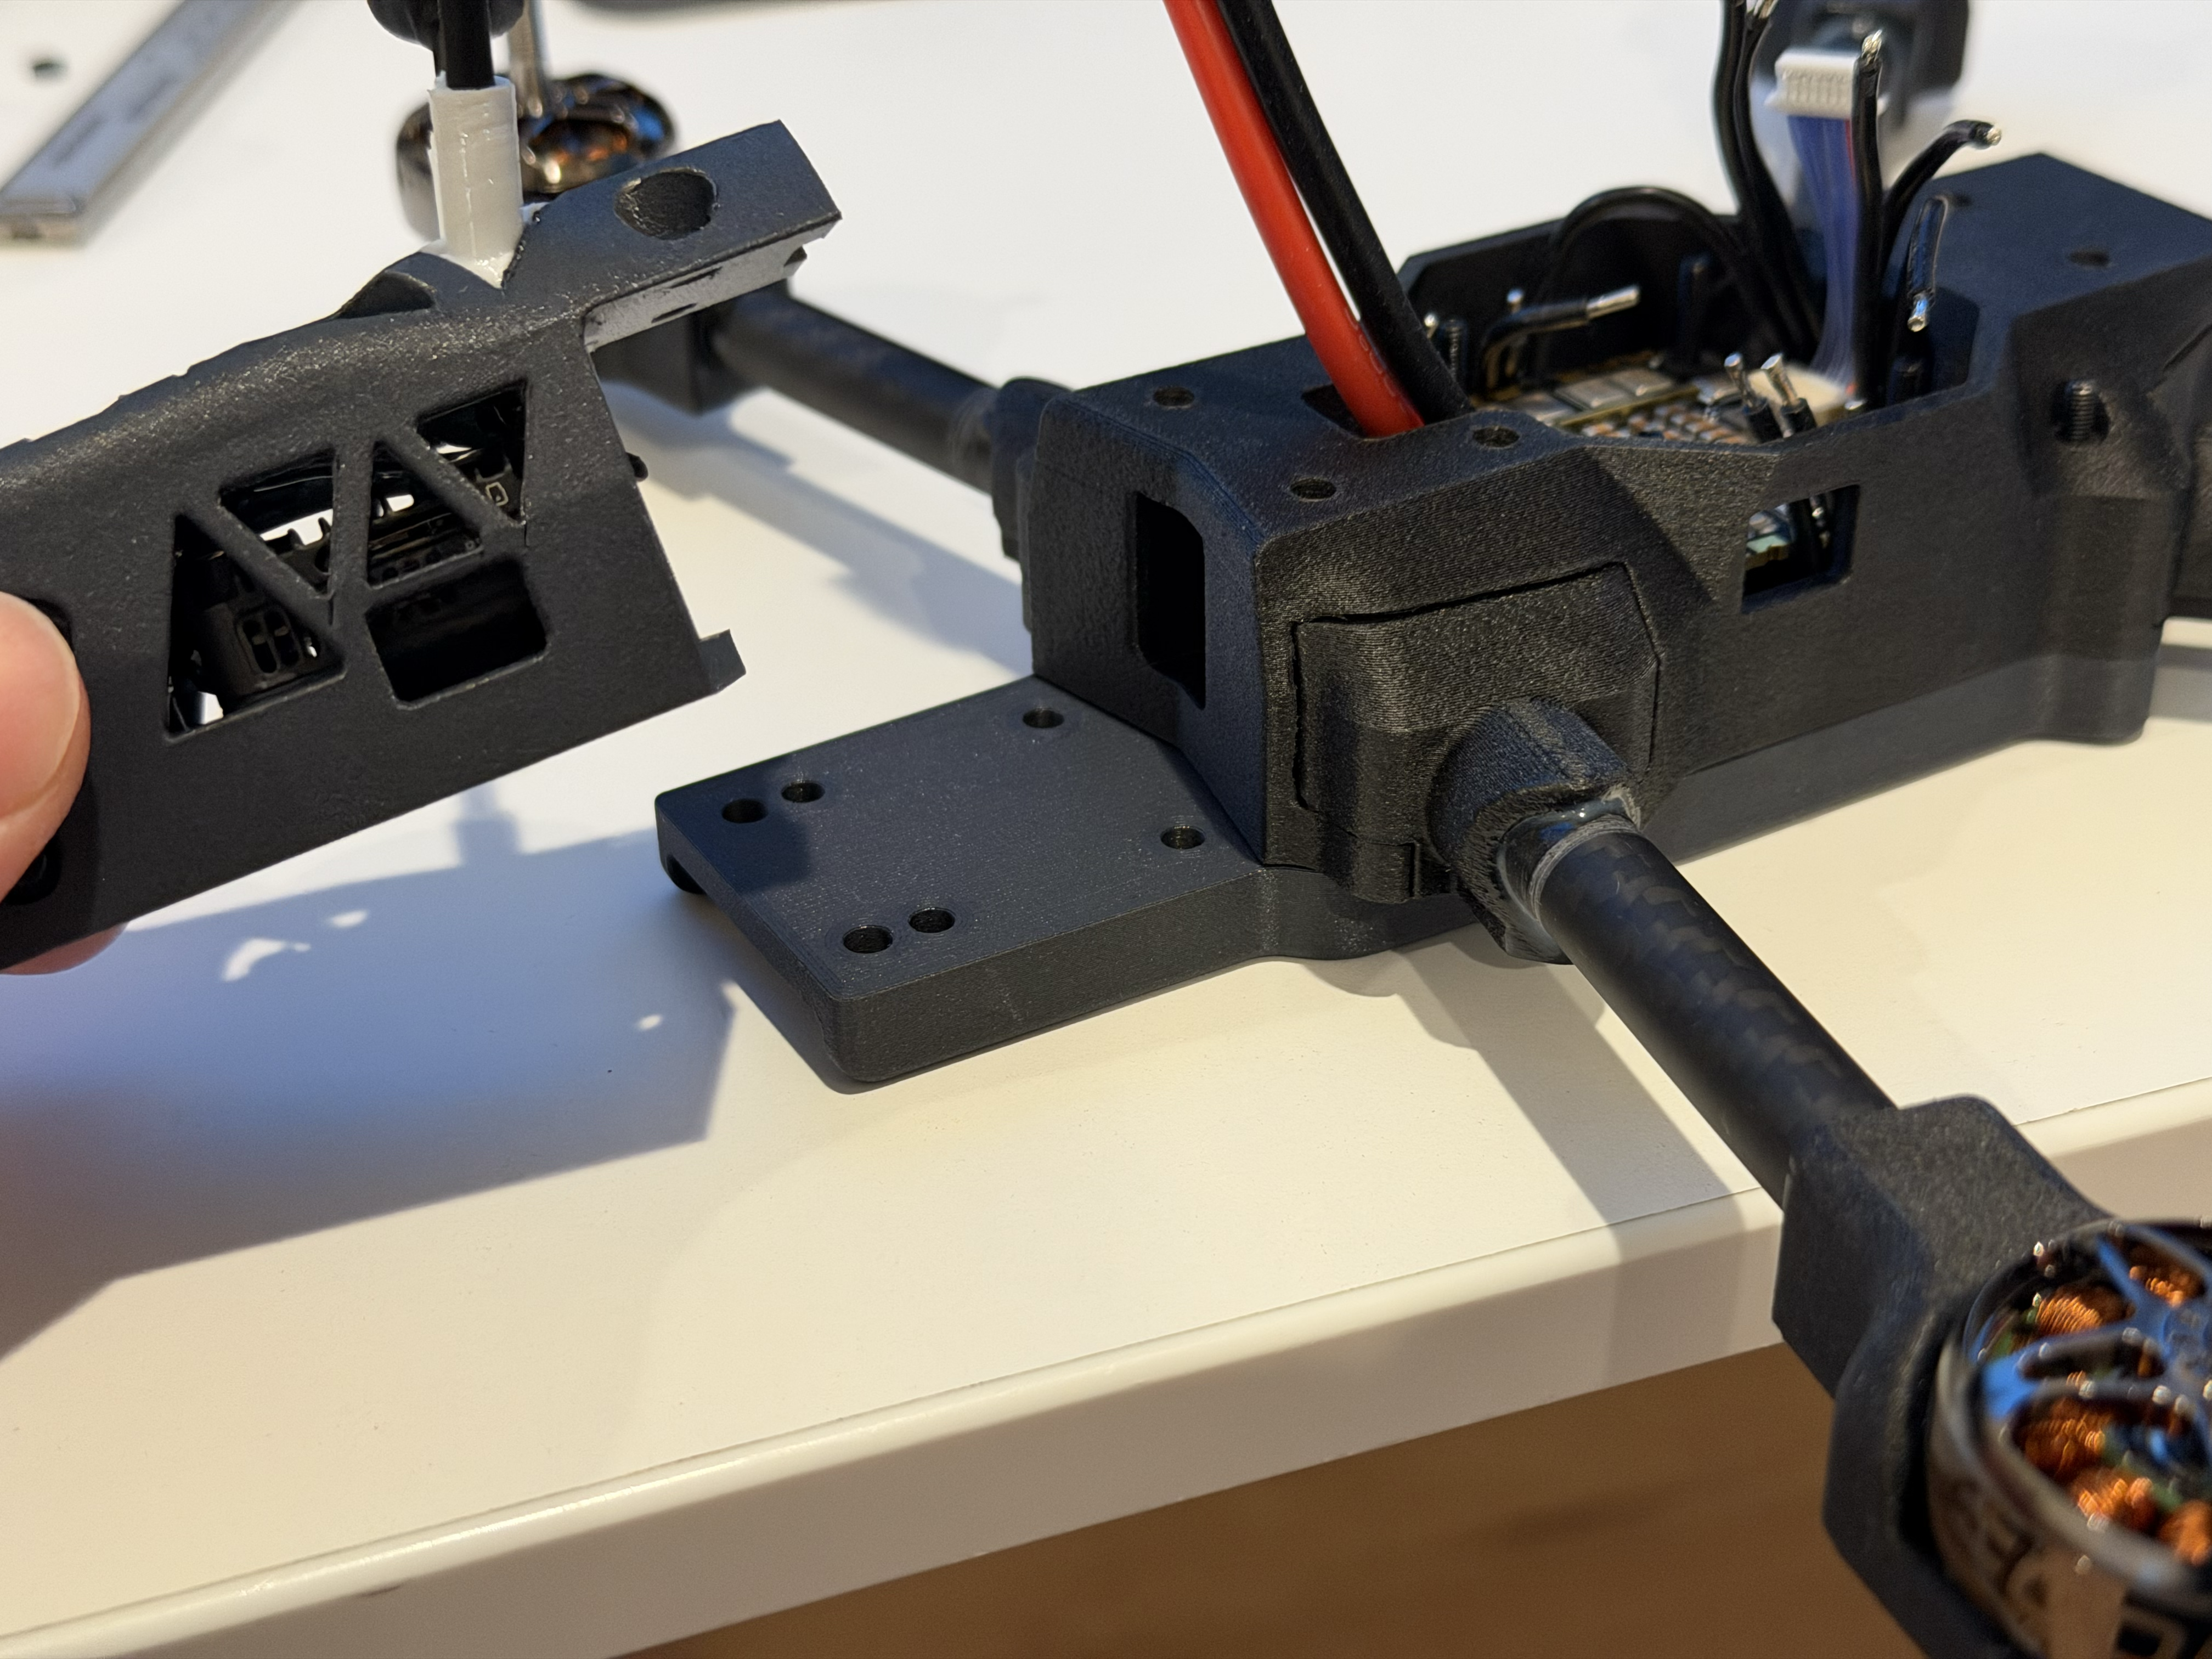
A modular payload bay on a standard mounting interface takes various attachments — cameras, sensors, lighting, or a drop mechanism.
How it works
The bay exposes a standard bolt pattern and a routed cable channel. Print the mount that fits your attachment, bolt it in, and route the lead to the flight stack. No proprietary connectors.
- ›Standard bolt-pattern mounting interface
- ›Routed cable channel to the flight stack
- ›Swap attachments in the field
- ›Mount STLs published with the airframe
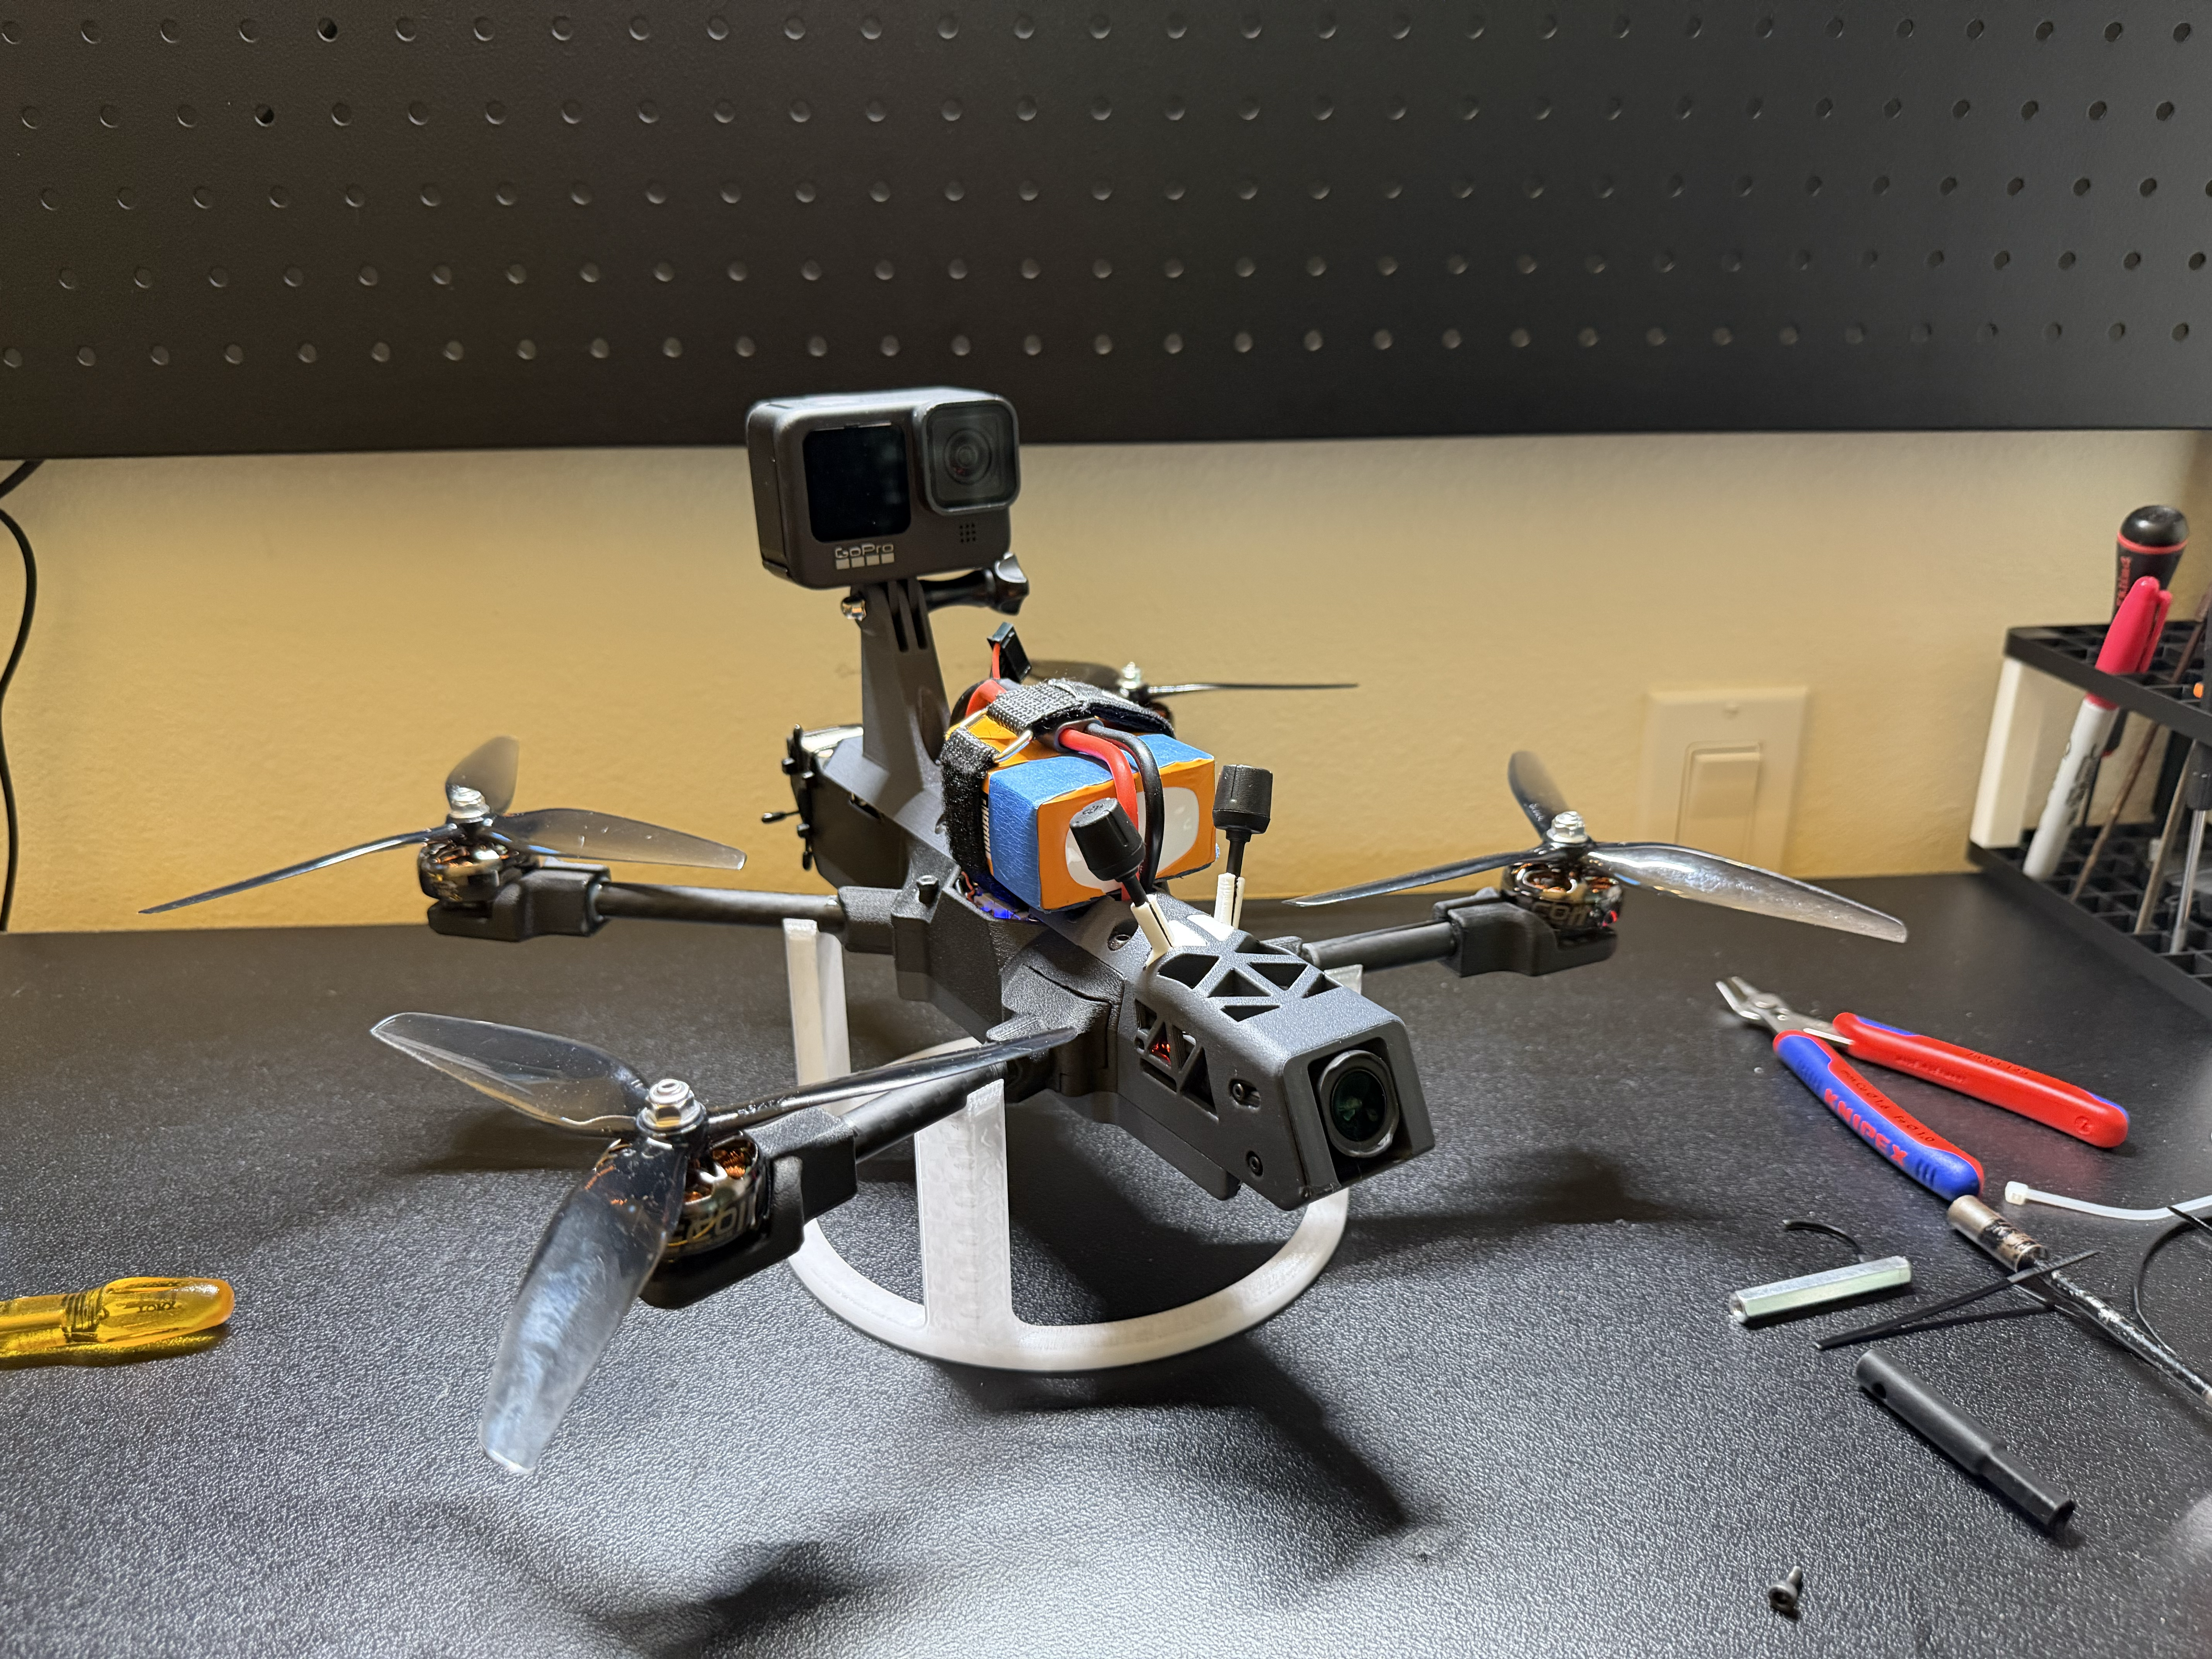
Example payloads
Anything within the weight and clearance envelope works. Common builds:
- ›Secondary action camera or HD recorder
- ›Environmental or mapping sensors
- ›Night-flight lighting
- ›Servo-actuated drop mechanism
Power
Tejo runs a traditional FPV LiPo for ease and accessibility — nothing proprietary. A 6S pack is the common choice, but the bay clears other cell counts too; pick what suits your flying and strap it in.
License
Tejo GEN 1 design files are sold under a Single-Builder Licence — for one builder's own non-commercial builds. Here is exactly what that covers.
What you are buying
Your purchase is a license to use the Tejo GEN 1 digital files — not a transfer of ownership. Jing Industries retains all intellectual-property, copyright, and design rights in the files, geometry, and documentation. The license is granted to you personally, and is non-exclusive and non-transferable.
The files covered include the chassis, arms, canopy, payload bay, mounts, and pre-sliced print plates — plus, for source pack buyers, the editable source CAD.
What you can do
- ›Print, build, and fly the Tejo for your own use
- ›Print as many copies as you need for yourself — spares, repairs, and rebuilds
- ›Modify, remix, and adapt the design for your own non-commercial builds
- ›Share photos and videos of your build, with credit to Jing Industries / Tejo GEN 1
What you cannot do
- ›Sell printed parts, kits, or complete builds made from these files
- ›Redistribute, share, resell, or give away the files themselves — paid or free
- ›Re-upload the files to model-sharing or file-hosting sites
- ›Use the design in a commercial product, paid service, or OEM integration
- ›Use it commercially or under a defence / government contract
- ›Remove or obscure attribution to Jing Industries
At a glance
Attribution
When you show the build publicly — social posts, forums, videos, or write-ups — please credit Jing Industries — Tejo GEN 1. A link back to jingindustries.com is appreciated but not required.
Modifications & derivatives
You are free to modify the design for your own builds. Any modified or derivative version stays subject to this license — it remains personal and non-commercial, and the files, modified or not, may not be redistributed or sold.
Commercial, partners & defence
Selling builds or parts, OEM integration, partnerships, defence or government contracts, or any other commercial use needs a separate commercial licence. We are glad to work out terms — see Commercial programs, or email info@jingindustries.com.
No warranty & liability
The files are provided “as is”, with no warranty of any kind. The Tejo is a high-performance, powered flying machine that you build yourself. You are responsible for sourcing parts, safe assembly, battery handling, and airworthiness. Jing Industries is not liable for any injury, damage, or loss arising from building, flying, or modifying the Tejo. Build and fly at your own risk.
Safety & legal compliance
You are responsible for complying with all local laws and aviation regulations for building and flying FPV drones — including registration, Remote ID, frequency and VTX-power rules, and where you are permitted to fly. Follow safe LiPo charging, storage, and handling practices at all times.
Commercial Programs
Fleet supply, commercial licensing, payload integration, and OEM terms for teams building on the platform.
Commercial programs have their own page now, with the full breakdown of each track and a form that reaches us directly.
Open Programs ›Start an enquiryNDAA-Aligned Variant
A US and allied-sourced configuration of the Tejo for government and defense evaluation — the same printed airframe, with the overseas hobby electronics replaced by compliant parts.
Every electronics line in the Parts List has a compliant counterpart: the EMAX 2807 motors become Unusual Machines / Rotor Riot 2807s, the MicoAir743 V2 and AM32 stack becomes an ARK FPV or Brave controller with a Brave or ModalAI ESC, the DJI O4 air unit becomes the Aura analog camera and VTX, the RadioMaster ELRS receiver is replaced by a professional datalink, and the MicoAir MG-A01 GPS becomes ARK GPS. The printed airframe, bonded arms, and payload bay interface are unchanged.
The full component selection, the compliance caveats, and the cost envelope now live on the Defense page, along with a route to request an evaluation unit.
Open Defense & government ›See the configuration